


- sales/support
Google Chat:---
- sales
+86-0755-88291180
- sales01
sales@spotpear.com
- sales02
dragon_manager@163.com
- support
tech-support@spotpear.com
- CEO-Complaints
zhoujie@spotpear.com
- Only Tech-Support
WhatsApp:13246739196
- Purchase/Shipping/Refund
WhatsApp:13424403025
- HOME
- >
- ARTICLES
- >
- Common Moudle
- >
- Camera
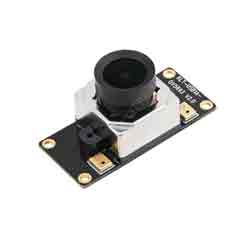
OV5693 5MP USB Camera (A) User Guide
Resource
Documents
Software
Specification
- Pixel: 5MP
- Sensor: OV5693
- DSP: Automatic white balance(AWB)\Automatic exposure(AEC)\Automatic gain control(AGC)
- Camera:
- CCD Size: 1/4inch
- Aperture (F): 2.1
- Focus length (EFL): 2.5mm
- Field of View (FOV): 135°
- Focus Type: Auto focus
- Interface: USB2.0
- Image:
- Format: MJPG, YUY2
- Static image resolution: 2592 × 1944
- Video recording (MJPG):
- 15 FPS 2592 × 1944
- 15 FPS 1920 × 1080
- 15 FPS 1280 × 720
- Video recording (YUY2):
- 3 FPS 2592 × 1944
- 5 FPS 1920 × 1080
- 10 FPS 1280 × 720
- 15 FPS 640 × 480
- Operating Voltage: 5V ± 5%
- Operating Temperature: 0°C ~ 50°C
- Len Size: 18.00 × 18.00 × 19.39 mm
- Dimensions: 18.00 × 36.00 mm
- OS Support: Windows, Linux, MacOS
Working with Windows PC
Test Software
Most of the Windows 10 PC has pre-install Camera software, you can use it to test the USB camera.
If your PC doesn't have Camera software, you can also download the AMCap test software from Resouce->Software and test.
Testing
- Use Camera Software of Windows
- Search "Camera" and open the software.
- Click the setting icon on the top left to configure the image/video.

- You can click the icons on the right to switch between Image Capture or Video Recording.
- AMCap Software
- Download and install the AMCap software.
- You can click the Options option, choose Video Capture Pin... or Still Capture Pin... to configure image/video.

Working with Raspberry Pi
Buster
- Open a terminal of Raspberry Pi (You can use the Ctrl+Alt+T shortcut):
- Edit the modules file:
sudo nano /etc/modules
- Add the following command in the document and save:
bcm2835-v4l2
- Ues command sudo raspi-config to open the configuration:
- Choose Interface Option -> Camera -> Yes to enable the camera and reboot.
Bullseye
You can directly test the USB camera on the Bullseye system.
Camera Test
- Open a Terminal of Pi and install luvcview tool with the following command:
- sudo apt-get install luvcview -y
- After installing, use the following command to test the USB camera.
- sudo luvcview -s 1920 x 1080


Working with Jetson Nano Developer Kit
- Open a terminal of Jetson Nano Developer Kit (You can use the Ctrl+Alt+T shortcut or open it by Mouse)
- Use the following command for previewing:
- nvgstcapture-1.0 --camsrc=0
- With the command, a preview window is opened

【Notice】You may need to use the camera by script/codes, in this case, you can refer to tools/libraries like Opencv yourself.
FAQ
Question:Why does the camera display abnormally when my hand touches it back?
Answer:
Do not touch the components on the back of the PCB with your hands, so as not to affect the electrical characteristics.
Question:Does the module get hot during use?
Answer:
It is normal that the module would generate a lot of heat during use.
Question:Why can't I control brightness, contrast, or other parameters?
Answer:
If you are using a Mac system and Opencv, some parameter settings are not available, so we recommend using a Linux system and the V4L2 driver.
TAG:
SpotPear
STLINK
Raspberry Pi 24.5 inch Type C/HDMI 2K Display 24.5inch Screen 2560x1440 Computer PC Phone For Xbox/PS4/Switch
ESP32 C3 Round LCD Development Board Electronic EYE 0.71 inch Display Watch Screen GC9A01 160x160
Gyroscope Sensor
spotpear
4 inch e Paper HAT+ E Ink Spectra E6 Full-Color 600x400 Screen Display For Arduino /Raspberry Pi /Jetson Nano /STM32
RV1103
PC USB Secondary Screen
RV1103
Raspberry Pi Transparent Screen
ESP32 C3
Raspberry Pi Pico Screen
SpotPear
Raspberry Pi 5 PCM5122 I2S Audio Card DAC Also For PI4 /PI3 /Zero Series
RP2350B-MINI-A picotool Tutorial
AV to RGB
Raspberry Pi PICO
ESP32-S3 Development Board 1.47 inch LCD Screen Display 172x320 SD-Port LVGL USB
Spotpear
TAG:
Raspberry Pi 5 PCIe M.2 5G 4G 3G RM520N-GL
X1012 Raspberry Pi 5 POE PCIe to M.2 NVMe SSD Power over Ethernet
CPU
ESP32-P4-NANO RISC-V WiFi6 MIPI CSI Camera 10.1 inch DSI Display USB RJ45 Ethernet POE Audio Buzzer
Milk-V Duo BUY
Arduino UNO R4 Minima
Arducam CSI-to-HDMI
ESP32-S3 A7670E 4G development board supports LTE Cat-1/2G/GNSS positioning/WiFi/Bluetooth
Metal Case
USB TO RS485
X1011 Raspberry Pi 5 PCIe M.2 NVMe 4-Ports SSD Pi5 Four-Times 2280
ESP32 0.85inch LCD
AURORA AI Laser Radar Dual Eye Camera IMU Integrated Positioning Map
D-Robotics RDK S100 Camera Expansion Board MIPI + GMSL Interface
Raspberry Pi 5 - 4GB RAM
Raspberry Pi
ESP32 C3 ST7735
Flipper Zero ESP32S2 WiFi Dev Board official
M12 High Resolution Lens 12MP 113 2.7mm Raspberry Pi High Quality Camera M12
Raspberry Pi 5 RTC charge