


- sales/support
Google Chat:---
- sales
+86-0755-88291180
- sales01
sales@spotpear.com
- sales02
dragon_manager@163.com
- support
tech-support@spotpear.com
- CEO-Complaints
zhoujie@spotpear.com
- Only Tech-Support
WhatsApp:13246739196
- Purchase/Shipping/Refund
WhatsApp:13424403025
- HOME
- >
- ARTICLES
- >
- Jetson Series
- >
- Jetson Kits
Jetson-nano-to-boot-the-system User Guide
Introduction
Herein mainly introduces Jetson Nano modules with 16GB eMMC memory according to official nvidia tutorial. All information is subject to the official website of nvidia.
Reference Links
- https://developer.nvidia.com/embedded/learn/get-started-jetson-nano-devkit#write
- https://docs.nvidia.com/jetson/archives/l4t-archived/l4t-3261/index.html#page/Tegra%20Linux%20Driver%20Package%20Development%20Guide/flashing.html#wwpID0E01O0HA
Hardware Preparation
- Jetson Nano module, corresponding power supply and heatsink
- Ubuntu18.04 computer host
- U disk with USB interface or mobile hard disk (USB3,0 is recommended)
- a USB data cable (Micro USB interface, for transmitting data)
Software Preparation
- Install SDK Manager and flash system configuration for Jetson Nano.
- Tutorial: SDKM flash Nano
- Record the address of the downloaded HW Imager during the flashing process for later.
- Connect the U disk to the nano, and check the device number of it in the nano, such as sda.
ls /dev/sd*
- Insert the U disk to the ubuntu computer.
- Check the device number of the U disk on the computer, such as sdb.
sudo lsblk -p -d | grep sd
- Note: If your U disk has been partitioned before, it is recommended to format and adjust it to a partition on another computer first.
- Format the USB drive to ext4
sudo mkfs.ext4 /dev/sdb
- Note: Please refer to your actual situation for the specific device number. Some devices may be sda or others.
- Mount U disk
sudo mount /dev/sdb /mnt
- Enter the HW Imager address and copy the rootfs.
cd <path>/Linux_for_Tegra/rootfs/
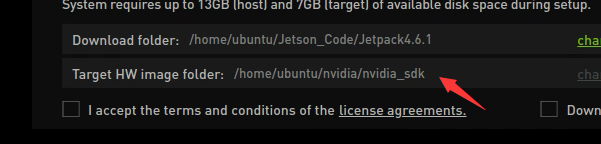
- Note: Please refer to your actual address. For example, the author's path command:
cd/home/ubuntu/nvidia/nvidia_sdk/JetPack_4.6.1_Linux_JETSON_Nano_TARGETS/Linux_for_Tegra/rootfs/
- Copy the file system to the U disk.
sudo tar -cpf - * | ( cd /mnt/ ; sudo tar -xpf - )
- After finishing the copy, unmount the U disk, (note: don't pull it out).
sudo umount /mnt
- Set up nano as recovery mode (refer to the flashing tutorial), then connect it to the ubuntu computer and input the flashing command.
cd ../
csudo ./falsh.sh jetson-nano-emmc sda
- Note: Sda should be filled in as the actual device number of the U disk recognized by nano in the first step.
- After flashing, disconnect the nano and the U disk. Insert the U disk to the Nano before powering on it, and follow the prompts to complete the configuration.
TAG:
ESP32-S3 AI Camera 3.5inch LCD Dual MIC Development Board MINI TV BOX Display 3.5 inch Voice Interruption Object Recognition 10-in-1 Multifunctional
Milk V Duo UART
GC9A01
NVIDIA Jetson Orin Nano Developer Kit Official Original 8GB AI 40Tops For Embedded and Edge Systems
ESP32 P4 Development Board WIFI6 3.4 inch LCD Round Display 3.4inch TouchScreen 800×800 Dual Microphones
MPS2280D Raspberry Pi 5 PCIe to M.2 NVMe Dual SSD Adapter Board HAT Pi5 Double 2280
Raspberry Pi PCF8591 expansion board LED GPIO IO test ADC/DCA Sensor Beginner board
Pi5
ESP32-S3 AI Voice Dialogue Robot Mechanical Dog Development Board Toy Tabletop Pet Deepseek
Raspberry Pi 8 inch DSI LCD Display With 5MP Front Camera MIPI 800×480 Capacitive TouchScreen
VGA to TTL
Raspberry Pi Pico
Raspberry Pi 5 PCIe to 2.5G Ethernet Adapter Board Plug and Play
LuckFox Pico
Jetson Nano Fan
Raspberry Pi UART
SpotPear
ESP32
Raspberry Pi CM5 IO BASE B Mini Board a Base Development Platform Compute Module 5 IO Board with EEPROM And Encryption chip
Robotic Arm Control

TAG:
Raspberry Pi Pico DVI
ESP32-S3 Round LCD
Banana Pi
RV1103
Raspberry Pi 10.1 inch QLED Quantum Dot Display 1280x720 Capacitive Touchscreen Computer PC Jetson Game
PCIe to M.2 Adapter Board
Case For VisionFive2 Lite Cooling Enclosure Aluminum Alloy Material Cooling Fan With Camera Mount
Xbox/PS4/Switch
Industrial 8-ch PWM RS485 pulse output module Modbus RTU rail
SpeedyBee F405 V4 BLS 60A FC ESC Stack Flight Controller DJI FPV Drone
Ra
Raspberry Pi5 PCIe M.2 MINI Gen2 Gen3 SSD 2230 2242
Pi5 Fan
Raspberry Pi 5 Official Original AI Kit Hailo8l 13Tops 26Tops PCIe M.2 HAT Pi5
ESP32 1.54inch OLED
Sensor
AS7341 Sensor
Raspberry Pi Pico 2 RP2350 USB A Development Board
Raspberry Pi 5
4.26inch-e-Paper