- sales/support
Google Chat:---
- sales
+86-0755-88291180
- sales01
sales@spotpear.com
- sales02
dragon_manager@163.com
- support
tech-support@spotpear.com
- CEO-Complaints
zhoujie@spotpear.com
- Only Tech-Support
WhatsApp:13246739196
- Purchase/Shipping/Refund
WhatsApp:13424403025
Chapter 5 of KitiBot-Microbit: RGB LED User Guide
RGB LED
There are 4 RGB LEDs on control board, you can program to control their colors. This chapter we learn how to control the RGB LED.
【Note】The neopixel library of micro:bit is conflict with Bluetooth. We use APA102 type RGB LED instead of WS2812 to avoid of conflict.
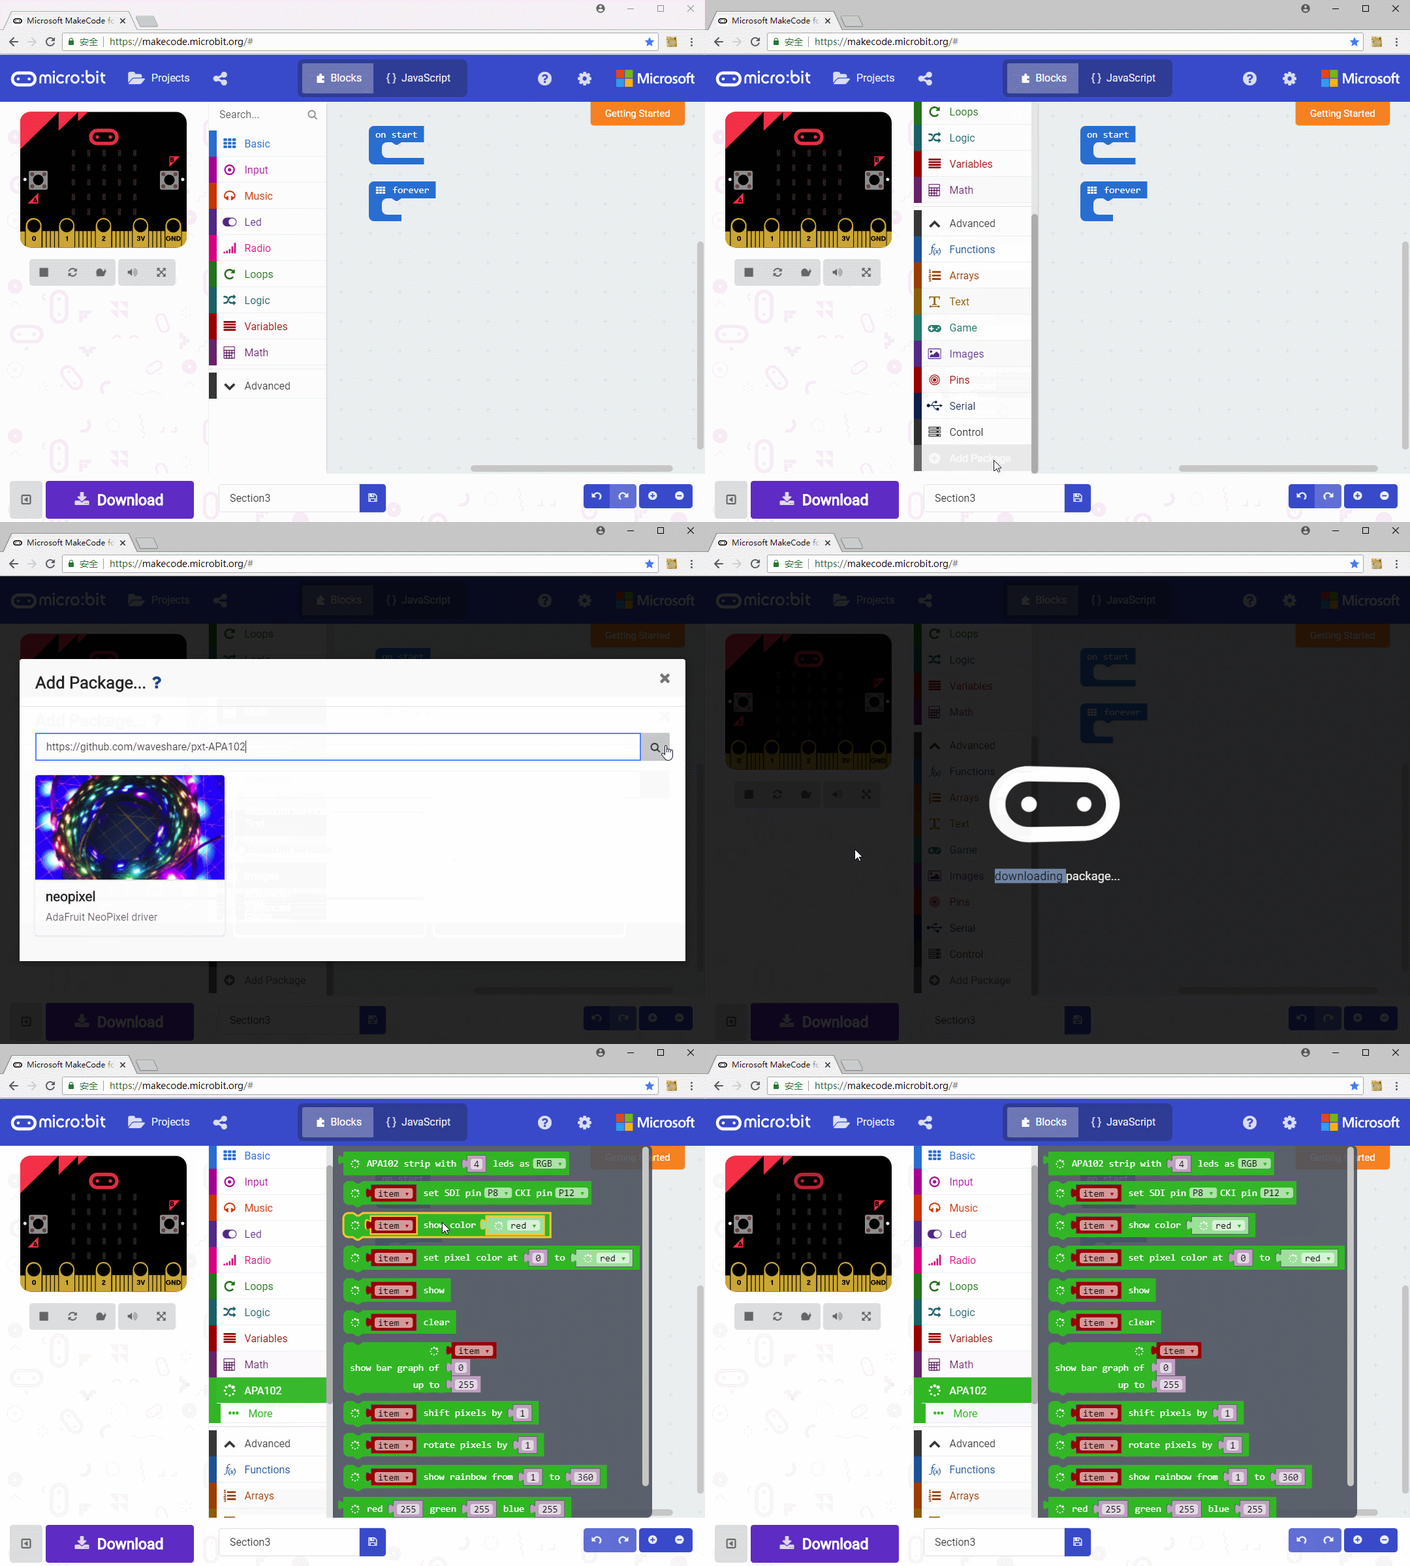
Create a new project, click Advance->Add Pakcages, input the address: https://github.com/waveshare/pxt-APA102 To add APA102 library. Affter adding, a new class APA102 can be chosen in Blocks area.
1. Lighting all RGB LEDs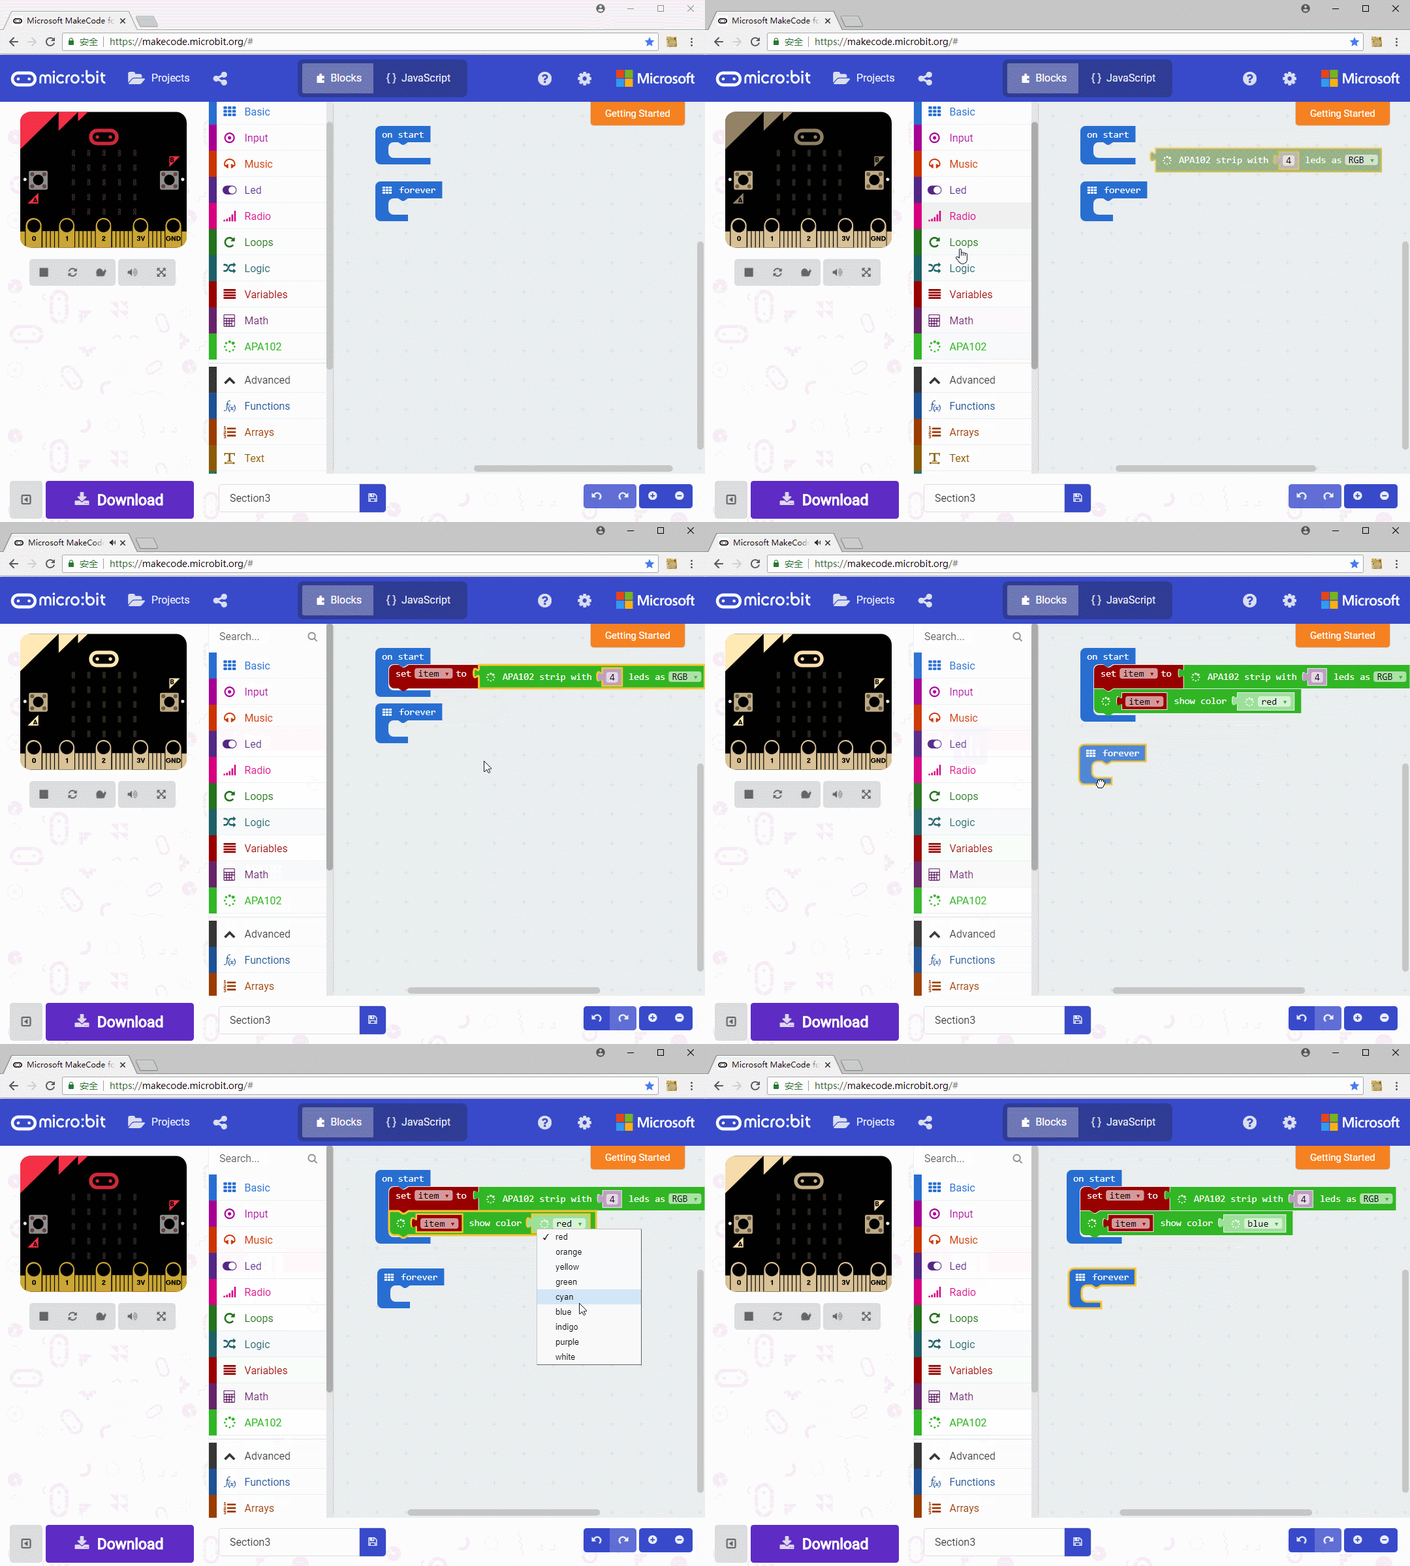
First initialize APA102, set 4 LEDs as RGB, and save it to variable item.

Note: Control board use P8 and P12 to control RGB LED by default, if you change them, you need to set control pins

You can also set the color with this block

Download our demo code, 4 RGB LED will all light on.
2. Display different color
We try to change the code above and let 4 RGB LED displays different colors separately
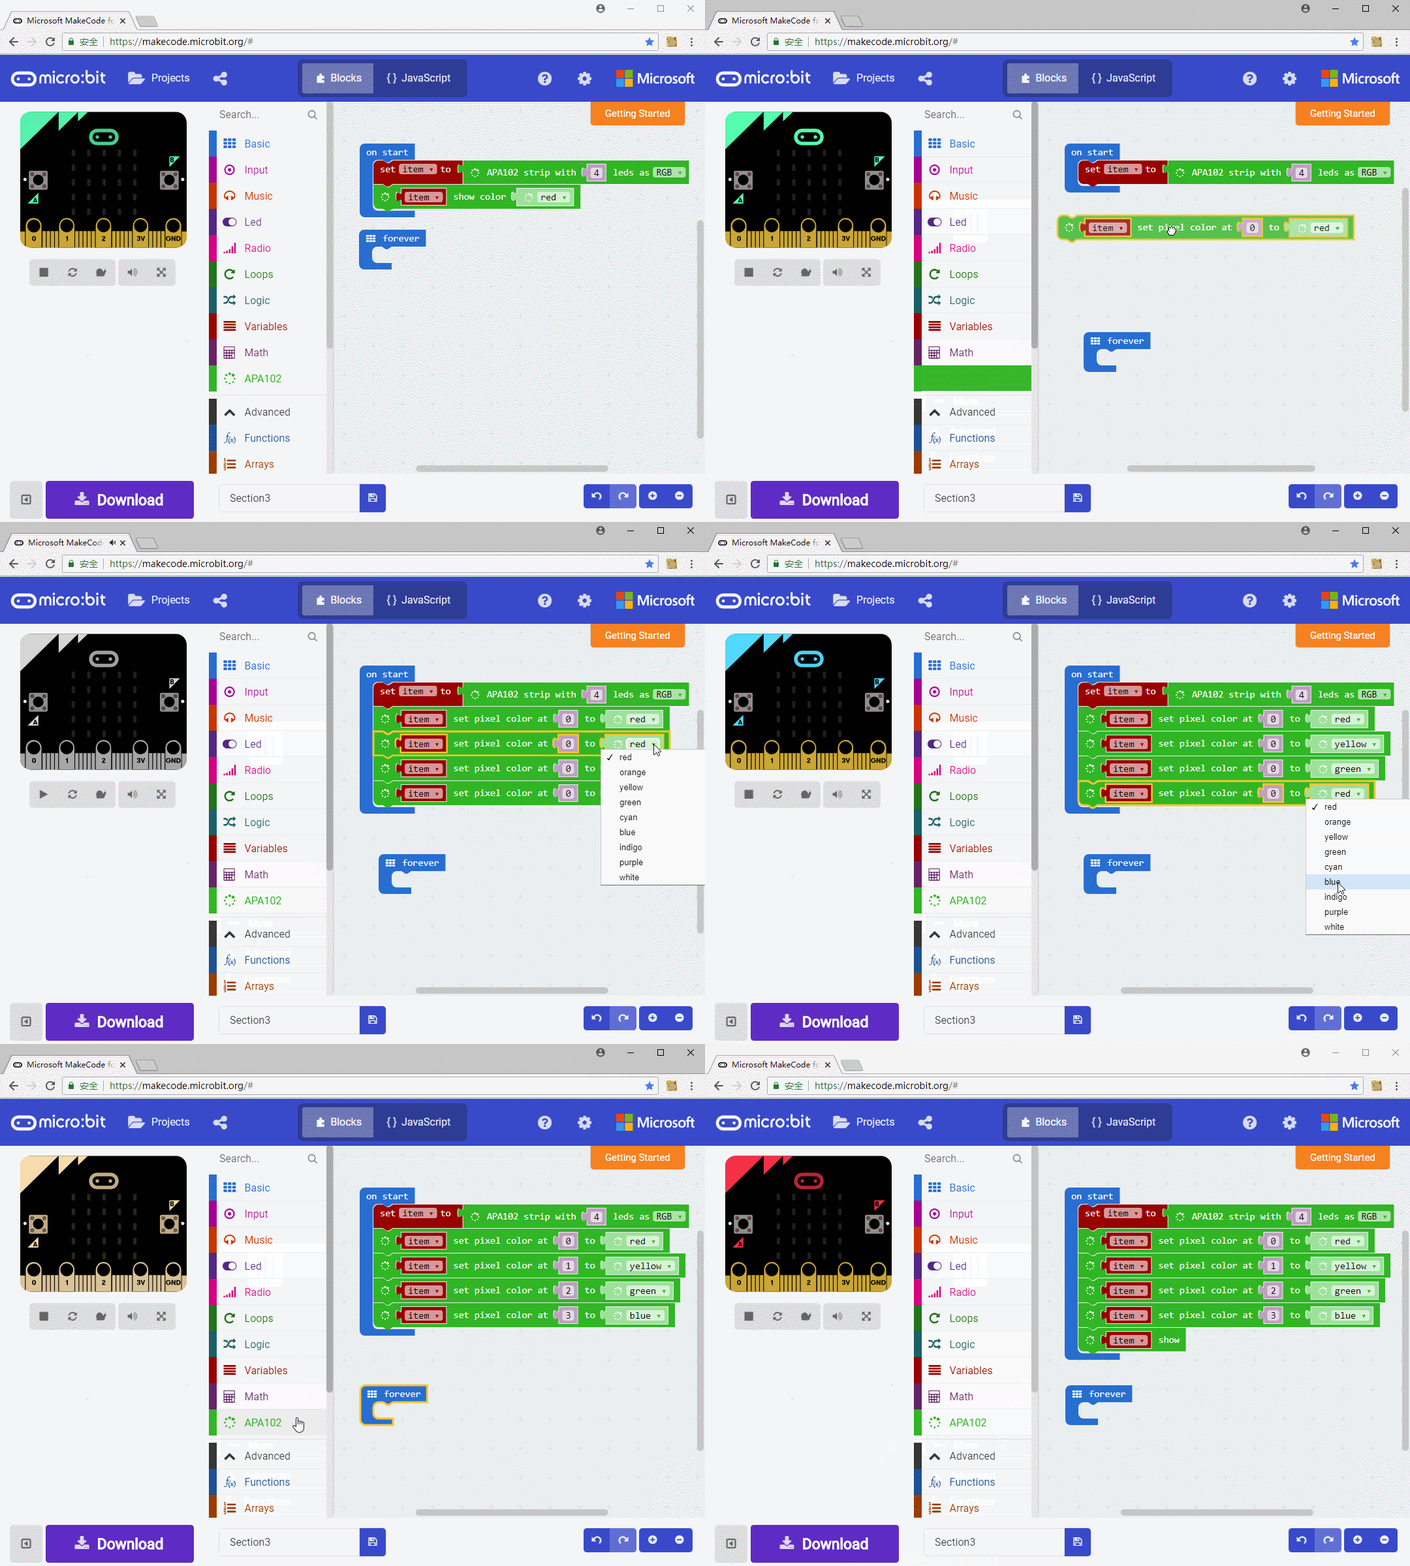
With this block, we can set pixel color from 0.

And show it. the color you set before could only showed with this block.

3. LEDs lighting alternately
Change the code to make RGB LEDs show red, yellow, green and blue alternately all the time.

Use rotate pixels block and rotate the color of current pixel to next pixel. Note that you need to add delay for the color movement is clearly visible.

4. Gradient Color
We let 4 RGB LEDs show Gradient colors

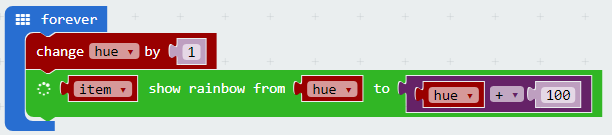
Block used in the code is show rainbow block. Its parameters stands for hue in range 1~360. Different hues cause different colors. The effect of this block is that show the color (1~360) on 4 RGB LED averagely. If there are more LEDs, more colors can be showed, and it will looks like a rainbow.

The rainbow block can simulate the rainbow, however, what we require is gradient color. Create a variable hue to save the hue value of RGB LED, then circularly display rainbow effect with the value from hue to hue+100. With hue value increasing, the color looks like gradient color.