- sales/support
Google Chat:---
- sales
+86-0755-88291180
- sales01
sales@spotpear.com
- sales02
dragon_manager@163.com
- support
tech-support@spotpear.com
- CEO-Complaints
zhoujie@spotpear.com
- Only Tech-Support
WhatsApp:13246739196
- Purchase/Shipping/Refund
WhatsApp:13424403025
Raspberry Pi OpenWrt Tutorial 2
Overview
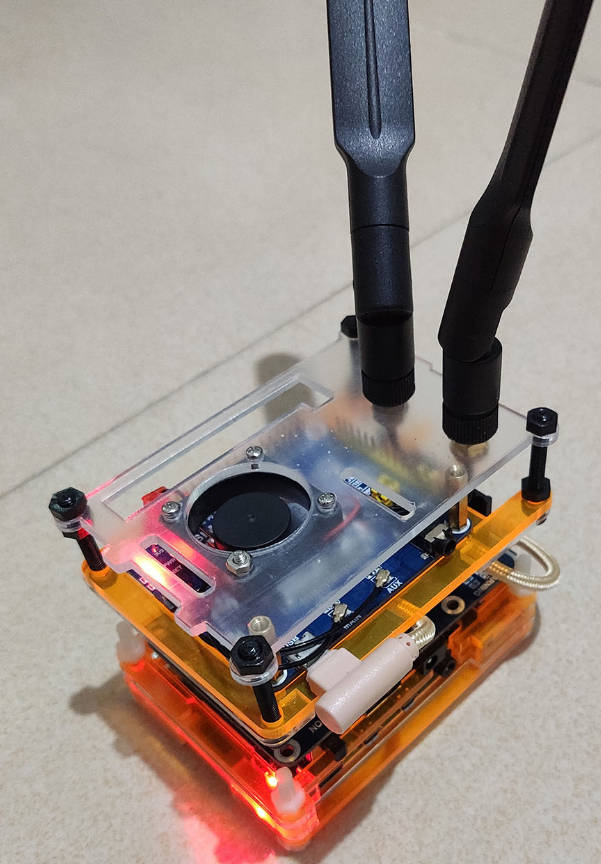
This chapter will introduce how to design a portable 4G mobile wireless router after Raspberry Pi 4B is equipped with the SIM7600 4G module, the Raspberry Pi UPS lithium battery expansion module, the Raspberry Pi cooling fan, and other modules. Also, we will describe the relevant steps in detail.
Working Principle
- First, the Raspberry Pi programs the OpenWrt soft routing system, so that the Raspberry Pi itself is equivalent to a wireless WIFI router;
- Secondly, configure the connected SIM7600X 4G expansion module, so that the Raspberry Pi router can connect to the Internet through the 4G module;
- Finally, an external UPS mobile power module is connected, so that the whole system can work independently and can be used anytime, anywhere.
Preparation
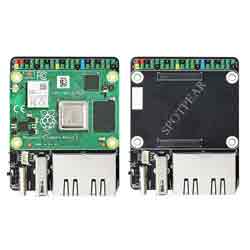
The hardware components, from top to bottom, are:
SIM7600X 4G expansion board: full Netcom, up to 50Mbps uplink and 150Mbps downlink, support GPS, phone and SMS, etc.
UPS power supply: 5200mAh, support charging and discharging, uninterrupted power supply.
Raspberry Pi 4B: Mainstream mini PC motherboard with powerful functions.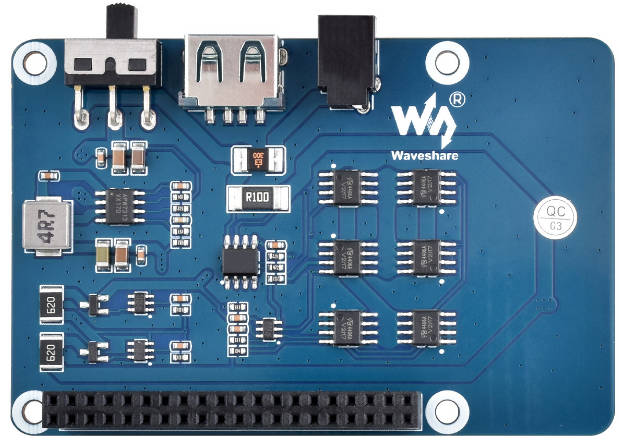
Raspberry Pi programming OpenWrt image
- Download the image.
- Program the image:
Download and decompress the image, and use Win32DiskImager to program the image. Select the image and click "Write" to program.
Environment Debugging
Connect and configure Raspberry Pi OpenWrt system WIFI
After programming the OpenWrt system, the default network port IP is 192.168.1.1, and the default is a 5G WIFI router.
- You can search through the WIFI of your mobile phone, find the WIFI open hotspot whose default name is "OpenWrt", and then connect.
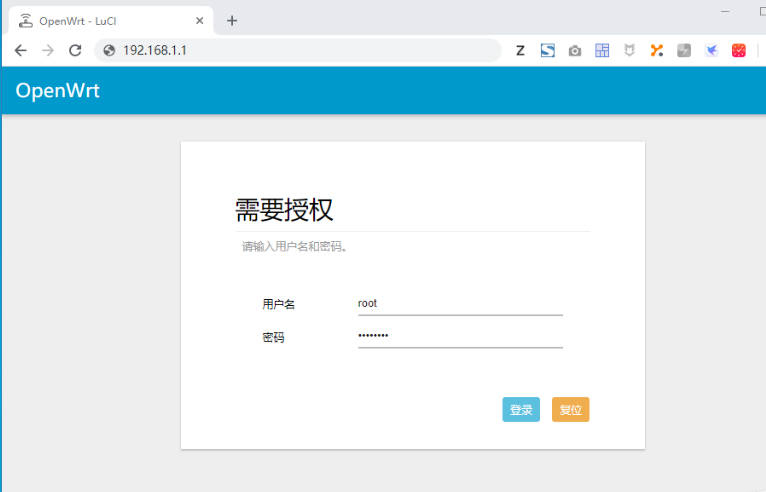
- Open the browser, enter: 192.168.1.1, the default username: root, and the default password: password.
Set WIFI password: Network -> Wireless -> Modify -> Interface Configuration -> Wireless Security, as shown below: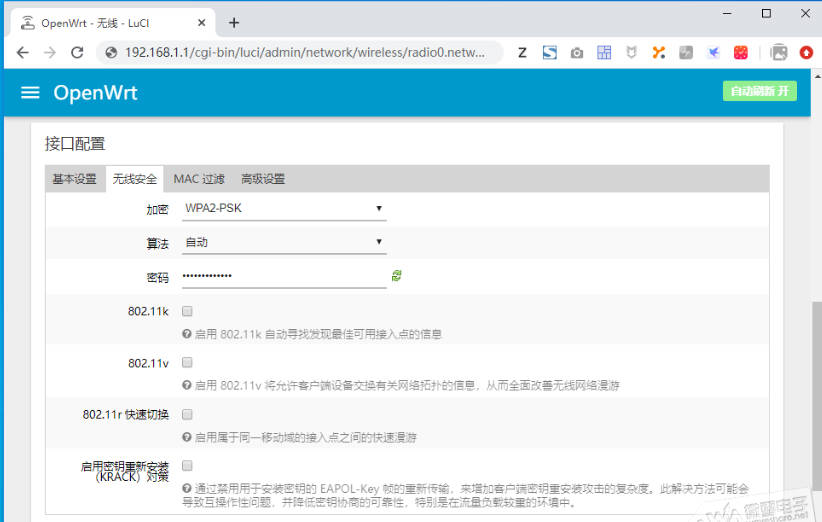
Configure SIM7600X 4G module
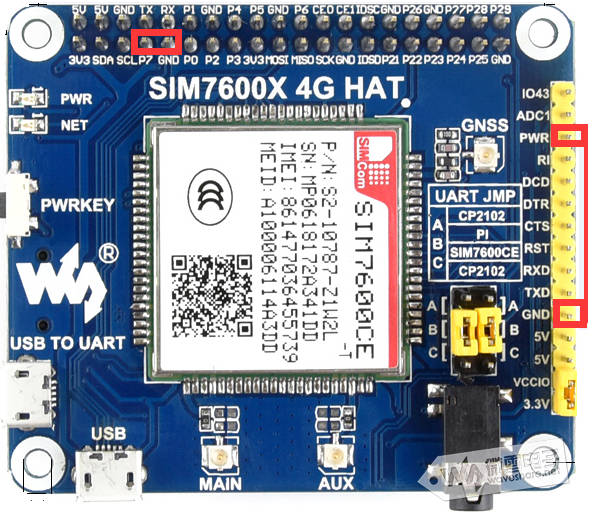
- Before starting to configure the SIM7600X, the hardware must be connected to a 4G data card or mobile phone card, press the PWRKEY button to turn on, and the normal NET light flashes to indicate that the automatic networking has started, if you want the module to automatically turn on, you can set the jumper as shown in the figure below:
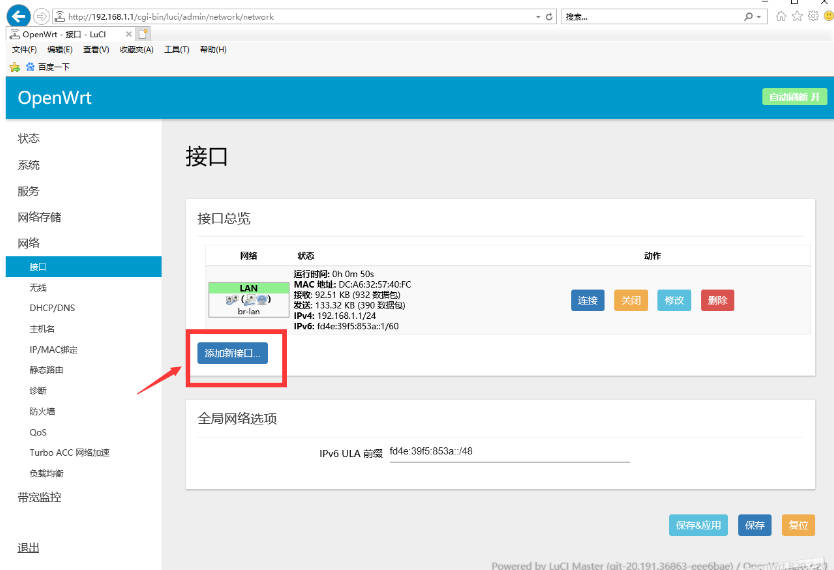
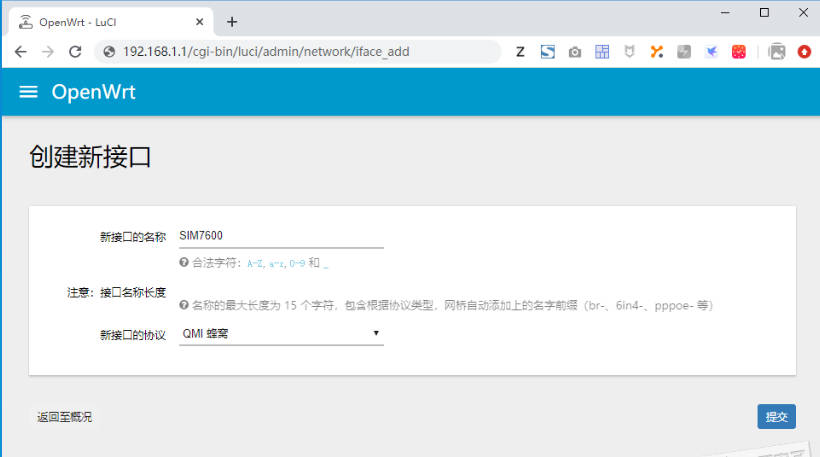
- Add a new interface: Network -> Interfaces -> Add New Interface, as shown in the following figure:
- Create new interface: name of new interface - SIM7600; protocol of new interface - QMI Cellular; submit:
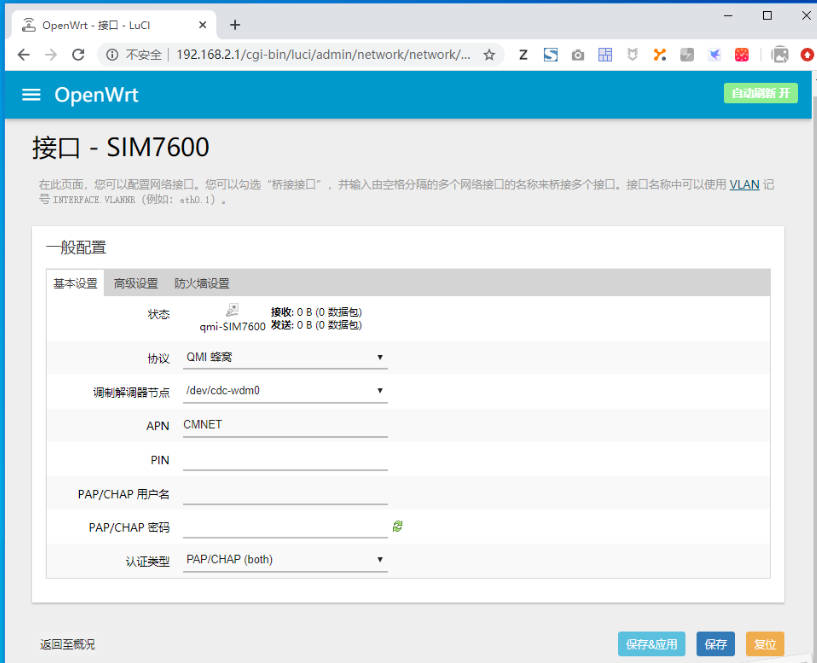
- Configuration Interface: Protocol - QMI Cellular; Modulator Node - /dev/cdc-wdm0; APN: 3gnet (mobile card can fill in CMNET); Authentication Type - PAP/CHAP (both); Save & Apply.
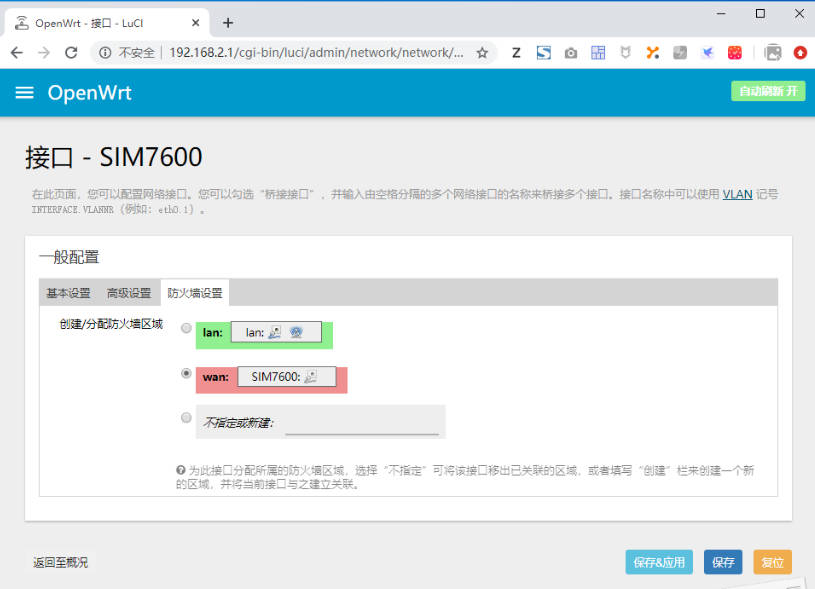
- Firewall Settings: Check wan:SIM7600; Save & Apply.
Enable SIM7600X 4G module networking
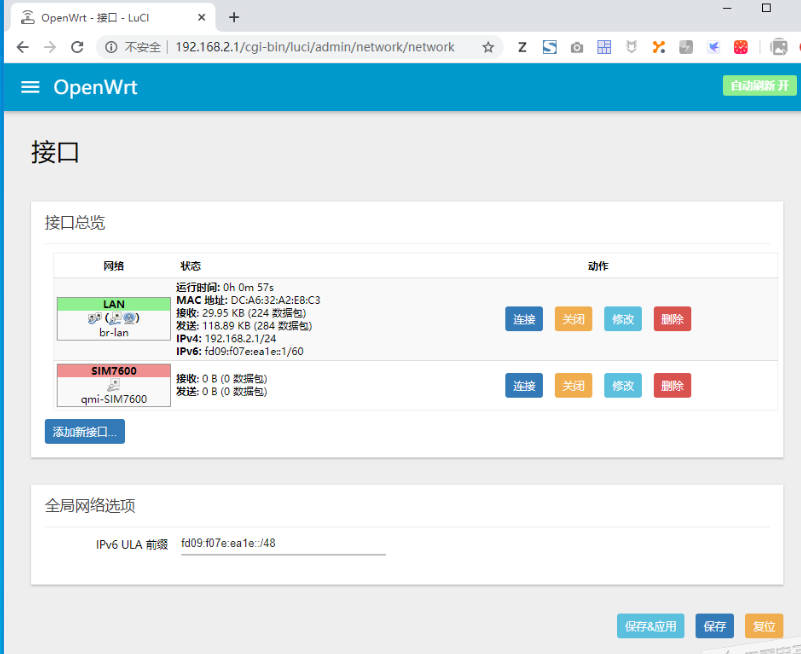
- After configuring the 4G module, open the network -> interface -> interface overview, find the SIM7600 WAN port, and click connect.
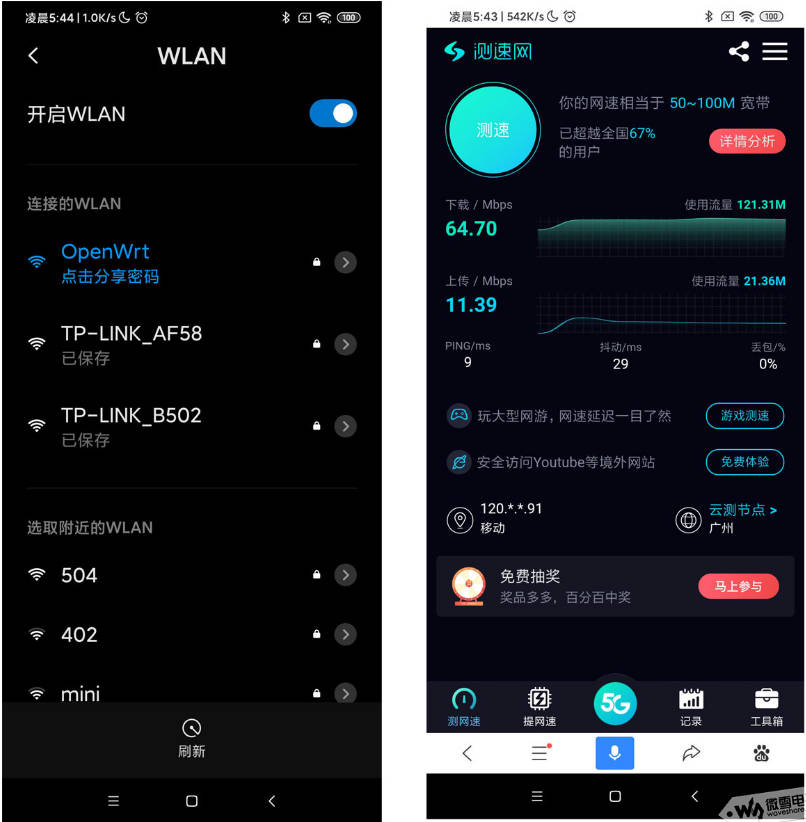
Connect to OpenWrt router, network speed test
- After setting the SIM7600 4G module, if you want to surf the Internet through 4G, you can disconnect the connected network cable.
- Use the mobile phone to search and connect to the OpenWrt hotspot. The actual speed measurement after the mobile phone is connected is shown in the following figure: