


- sales/support
Google Chat:---
- sales
+86-0755-88291180
- sales01
sales@spotpear.com
- sales02
dragon_manager@163.com
- support
tech-support@spotpear.com
- CEO-Complaints
zhoujie@spotpear.com
- Only Tech-Support
WhatsApp:13246739196
- Purchase/Shipping/Refund
WhatsApp:13424403025
- HOME
- >
- ARTICLES
- >
- Common Moudle
- >
- ESP
ESP32 One User Guide
Overview
ESP32 One is a development board powered by ESP32-D0WDQ6-V3, which features 802.11 b/g/m and BLE4.2.
The ESP32 One integrates power circuits, users can power the board by USB adapter or 4.2V batteries pack. The ESP32 One can be used for image recognition, voice processing, and more...
【Note】:
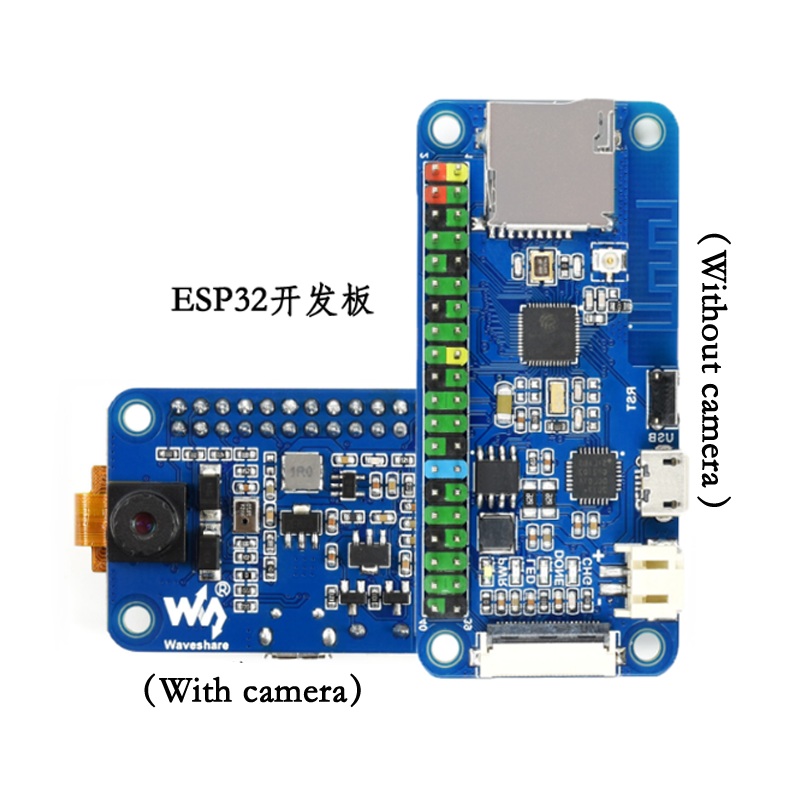
The ESP32 One Kit has an OV2640 Camera, and the ESP32 One doesn't.
Features
- OV2640 camera (optional) and digital microphone, supports applications like image recognition, voice processing...
- Standard 40PIN GPIO header, compatible with Raspberry Pi HATs for sorts of IoT applications
- Integrated Li-ion battery boost charging manager, supports battery charging/discharging, can also be powered from USB connection
- Compatible with Arduino and ESP-IDF software SDK, seamlessly connecting with ESP-WHO applications
- Onboard 8MB PSRAM, 4MB FLASH storage, supports SD extension as well
- CP2102 USB to UART converter, for serial debugging/programming
- 4x LED indicators, make it easy to check the operating status
Specification
| WIFI | 802.11b/g/n | ||
| Bluetooth | Bluetooth 4.2, including traditional BR/EDR, and BLE low-energy | ||
| Processor | Xtensa LX6 dual-core processor @240MHz | ||
| Camera | OV2640 (UXGA 1622×1200) (optional) | ||
| SRAM | 520KB+8MB | Flash | 448KB+4MB |
| Input Voltage | 3.3V ~ 5V | Operating Voltage | 3.3V |
| Charge Current | 1A@5V | Overall Consumption | 7.7mA@5V (ESP32 under deep sleep) |
| Dimension | 65mm x 30.5mm | Operating Temperature | -40℃ ~ 85℃ |
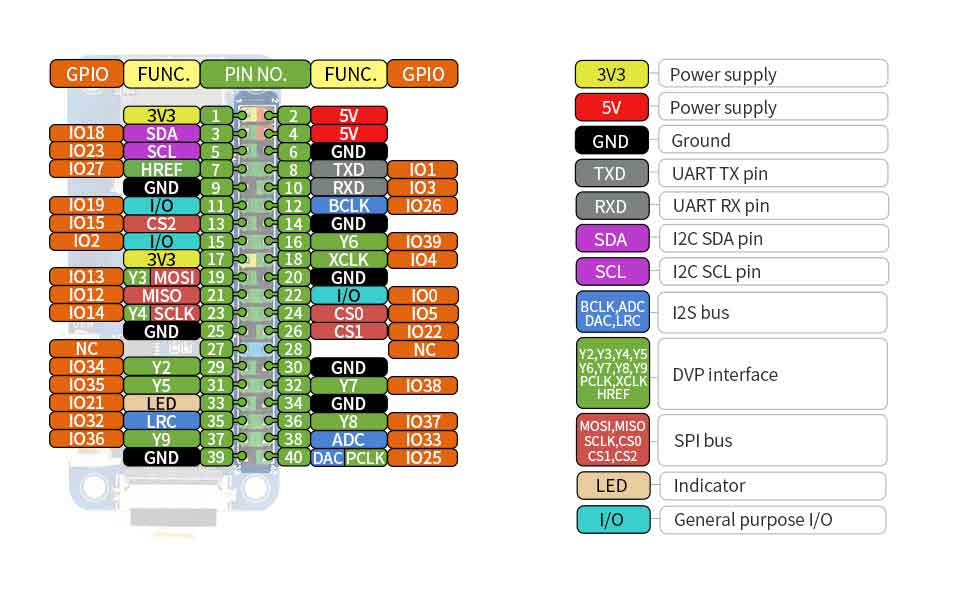
Pinout
Software Setup
The guide is based on Windows 10 PC. To develop the ESP32 one, you can use ESP-IDF or the Arduino libraries, for easy development, hereby we use Visual Studio Code.
If you want to use the board in Mac/Linux PC, please refer to ESPRESSIF's guides.
Install ESP-IDF
- Download and Install ESP IDF tools
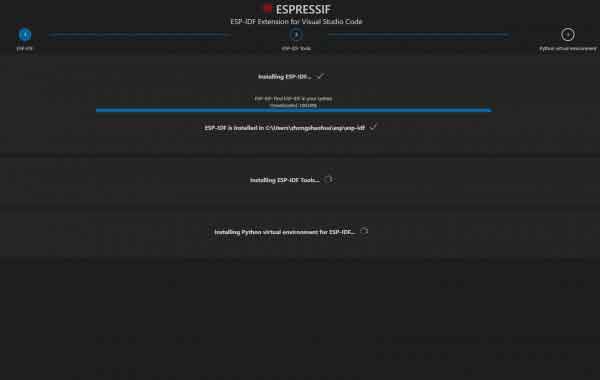
- Install the ESP IDF and keep the default setting. (It will automatically install Python3.7, Git tools and configure the environment parameters).

- Download and Install VS Code.
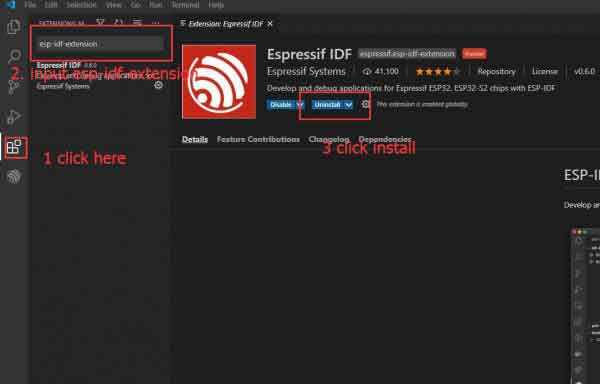
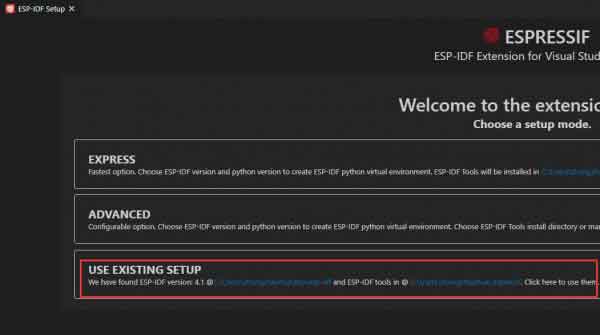
- Open The VS_Code, Press Ctrl+P, and search esp-idf-extension to install the package.
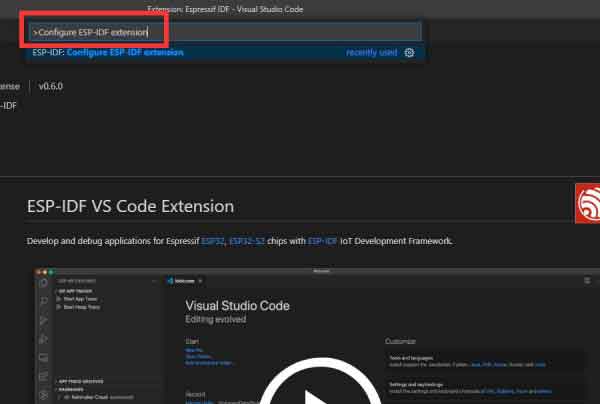
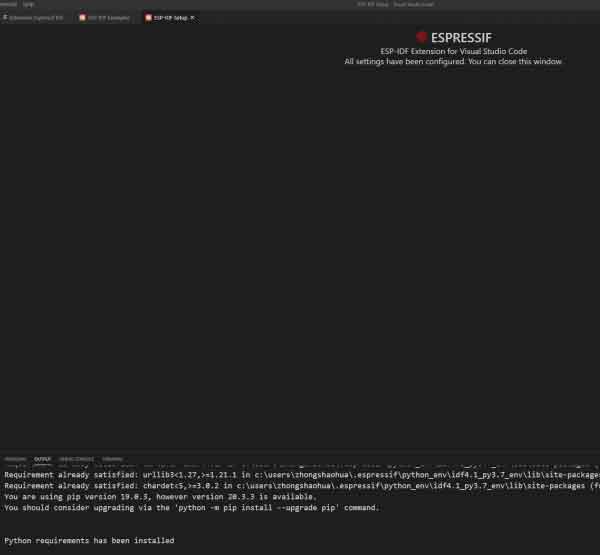
- In VSCode, you can press F1 and input Configure ESP-IDF extension to configure the package. You should select USE EXISTING SETUP in the configuration page
- Arduino Libraries
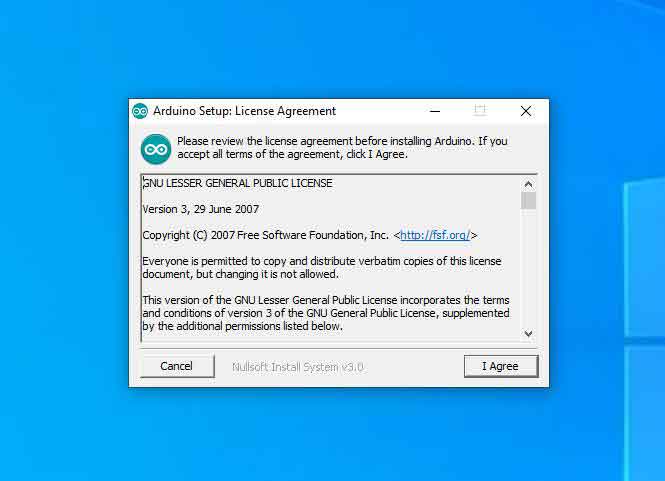
- Downlaod and install Arduino IDE, please use default setting
- Open the Arduino IDE install ESP32 libraries by following The configuration guides
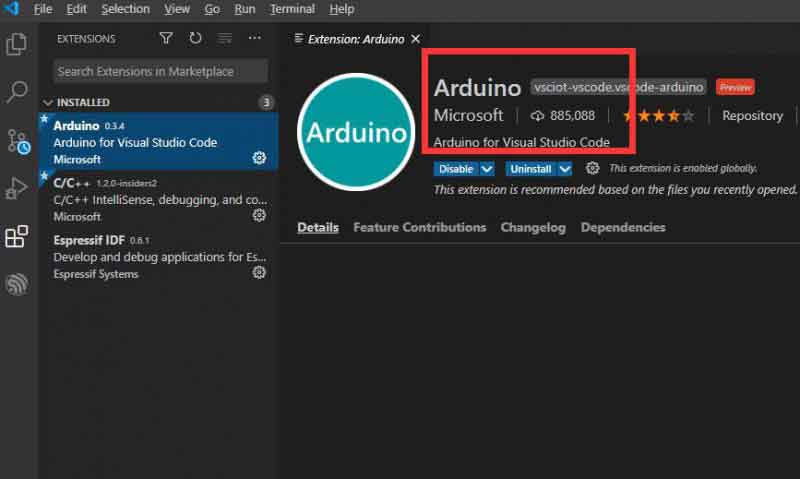
- Open VSCode, Install Arduino and C/C++ tools. (Please use Microsoft Publisher version).
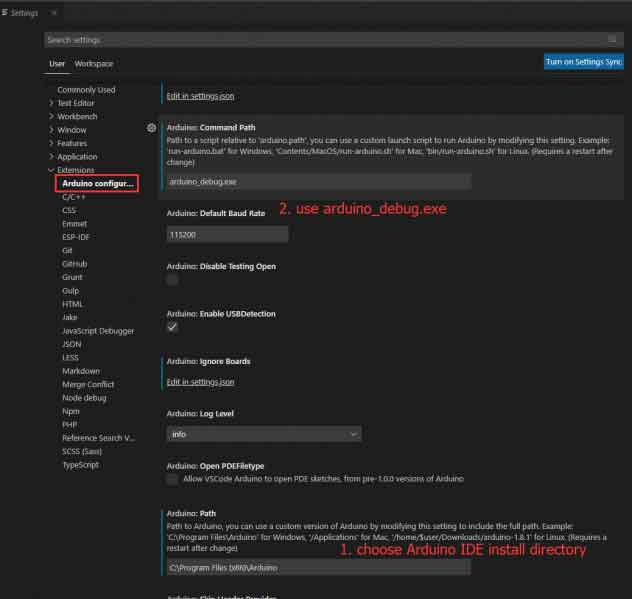
- After installing Arduino tools, press F1 and input Preferences Open Settings (UI)m Press Enter and find the setting of Arduino tools.
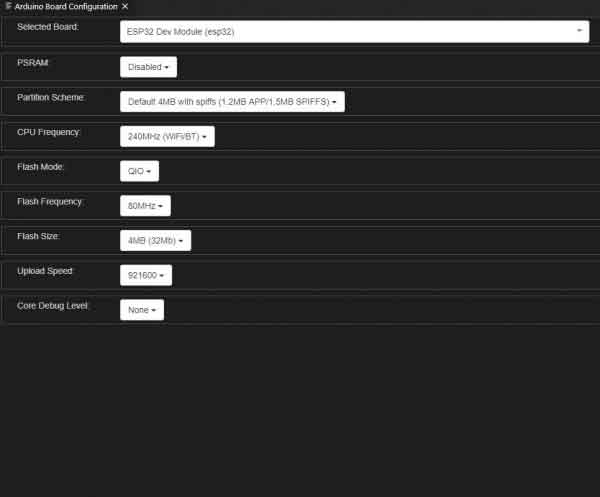
- Press F1 and input Arduino Board Config, Press Enter to configure board programming parameters.
Examples
ESP IDF Examples
- 1. blink example
1.1. Open VS Code,Press F1 and input ESP IDF Show Examples Projects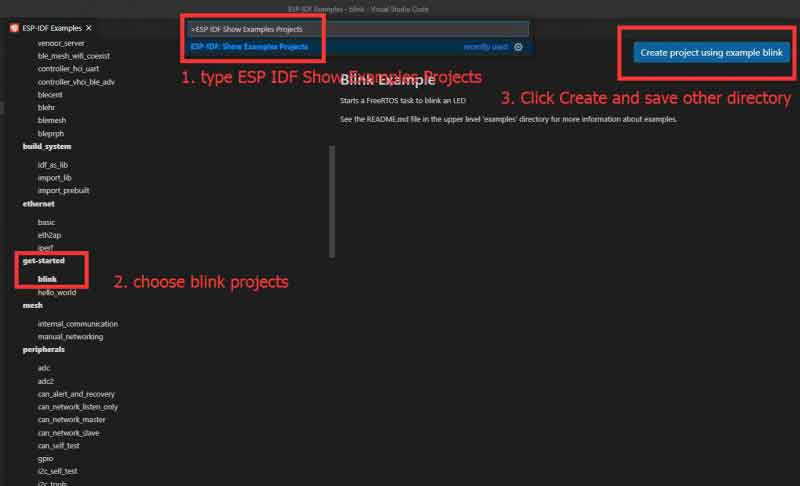
1.2. The LED of ESP32 One is mapped to Pin21, you need to first modify the pins and press Ctrl+ E and B keys to build the project.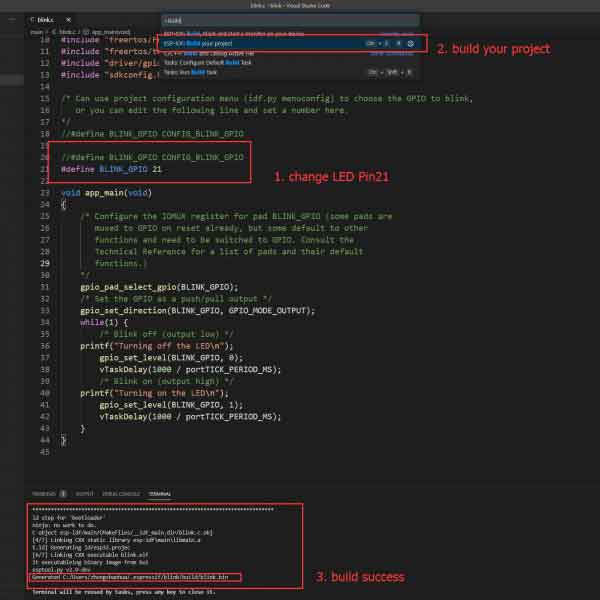
1.3 After built, connect the ESP32 One board to PC, press F1 and input Preference Open Settings (UI), select the correct COM Port
COM8(You need to select the correct one by check the Device Manager of your PC). Select UART and press Ctrl+E and
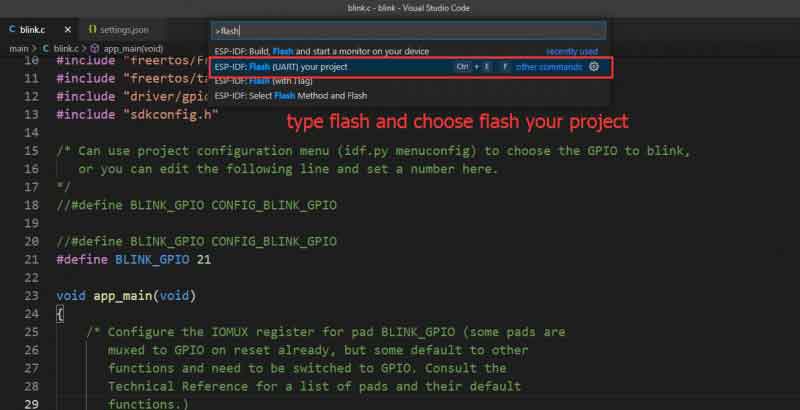
F keys to program the ESP32 One.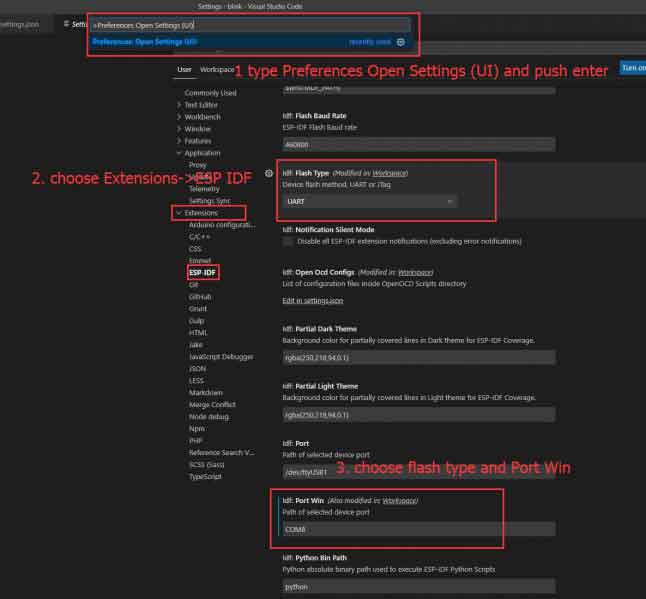
1.4 Press F1 and input Tasks Run Task, Enter and Select Monitor:Start the Monitor->
Continue without scanning the task output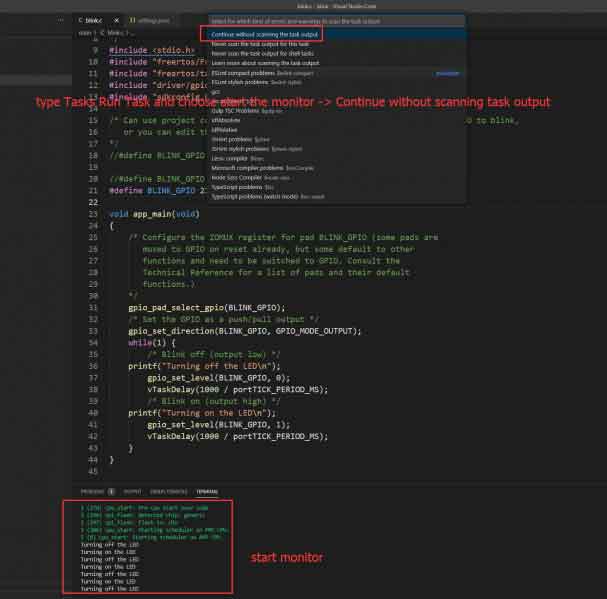
- 2. face recognition solution Examples
2.1 Use git tool to install esp-who software, run the Git Bash(You can right-click the Bash shortcut) software, and input the follow the following commands:
mkdir  ~/Documents/GitHub/
cd ~/Documents/GitHub/
git clone --recursive https://github.com/espressif/esp-who.git
2.2 The size of esp-who software is a little big, plase be patient. Select S Code->File->Open Folder打开esp-who\eaxmples\single_chip\face_recognition_solution after installing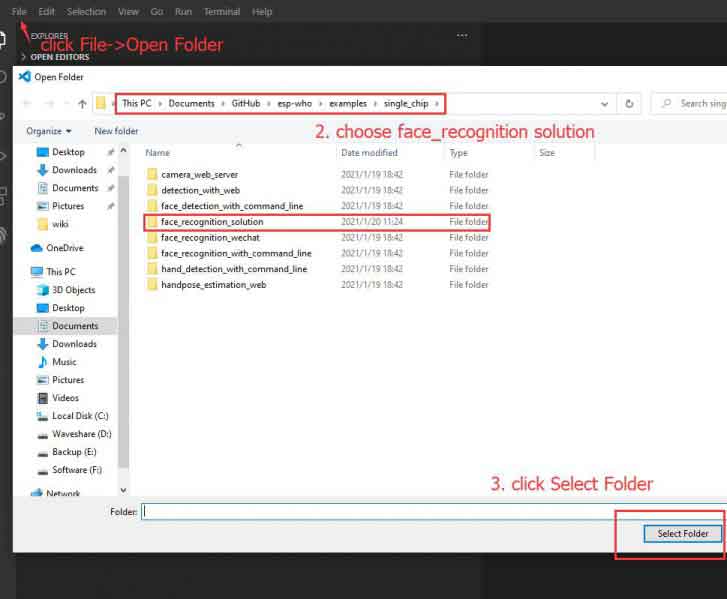
2.3 Press F1, input Add vscode configuration folder and Enter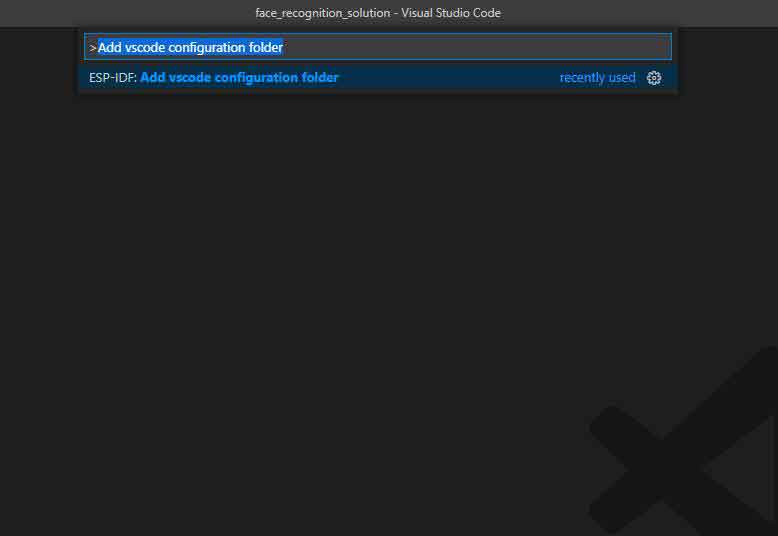
2.4 Press Ctrl+E and B to build. Press Ctrl+E and F to program. Press Ctrl+Eand M to monitor the serial por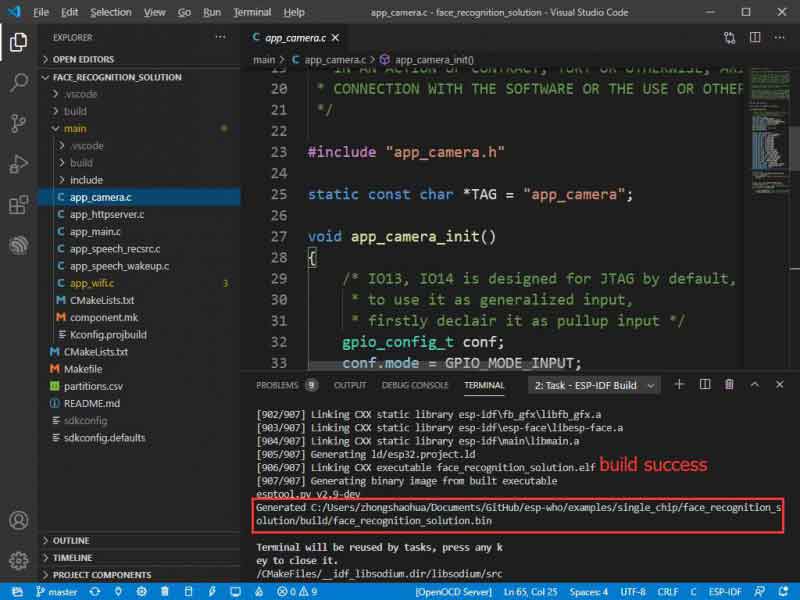
2.5 Say Hi, lexin to the onboard Microphone(on the backside) to wake the device up.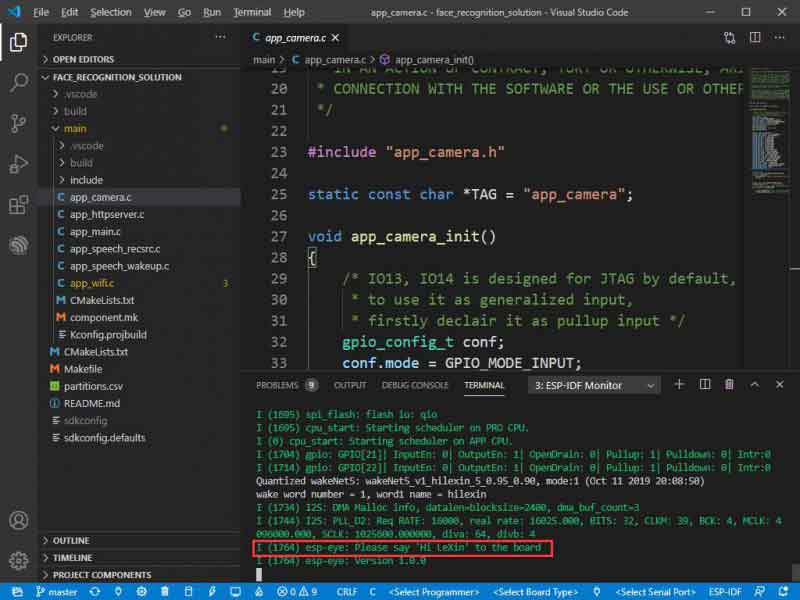
2.6 You can use Mobiephone and connect to the esp-eye-xxx WiFi. Open 192.168.4.1/face_stream with browser to test the example.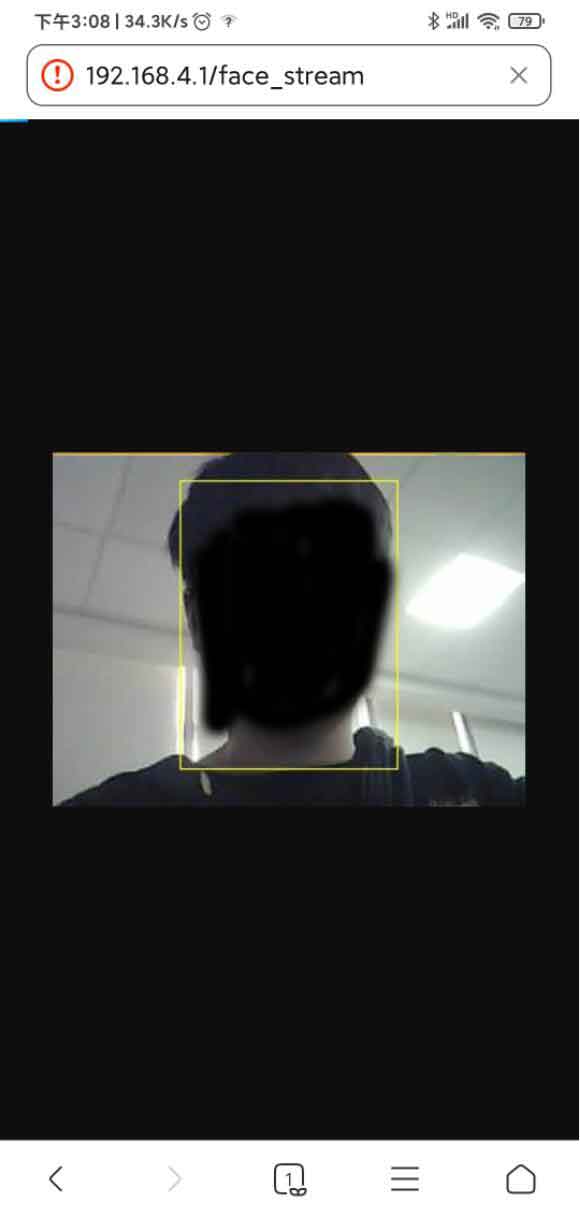
3. For more examples, you can refer to ESP-IDF Manual
e-Paper Examples
1. Download the e-Paper ESP32 Driver Board Examples, open the DEV_Config.h file and modify the pins as below table.
| PIN | ESP32 | Description |
| VCC | VCC | Power(3.3V input) |
| GND | GND | GND |
| SCK | 13 | SCLK pin of SPI interface, clock input |
| DIN | 14 | MOSI pin of SPI interface, data input |
| CS | 5 | Chip selec, low active |
| BUSY | 4 | Busy status output pin (High for busy) |
| RST | 19 | Reset pin, low for active |
| DC | 0 | Data/Command pin, Low for command and High for data. |
2. After modification, enter examples\ directory, copy the esp32-waveshare-epd folder to \hardware\espressif\esp32\libraries, which should be under the installation directory.
3. Connect e-Paper Driver HAT to the ESP32 One, and connect e-Paper to the HAT. Open VS Code as administrator. Open the e-Paper project (Choose the one according to the type of your e-Paper)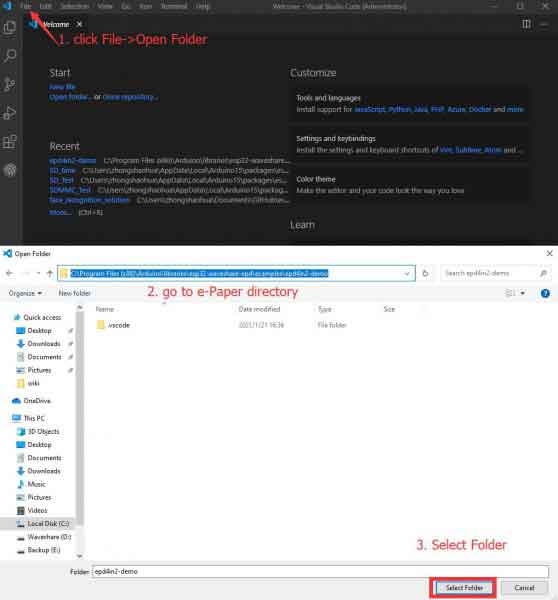
4. Choose programmer, board, COM Por: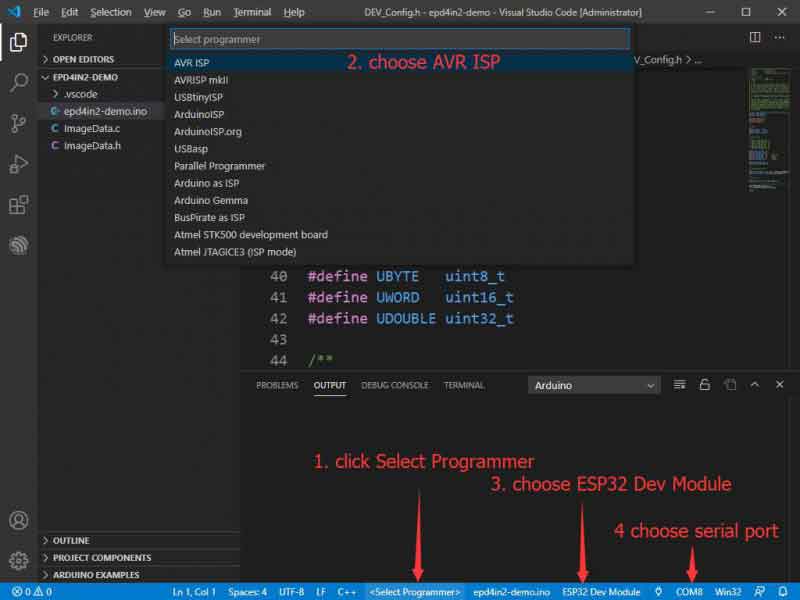
5. Press Ctrl+Alt+U to build and program ESP32 One.
6. For more information about the examples, please refer to e-Paper ESP32 Driver Board