


- sales/support
Google Chat: zj734465502@gmail.com
- sales
+86-0755-88291180
- sales01
sales01@spotpear.com
- sales02
dragon_manager@163.com
- support
services01@spotpear.com
- CEO-Complaints
manager01@spotpear.com
- sales/support
WhatsApp:13246739196
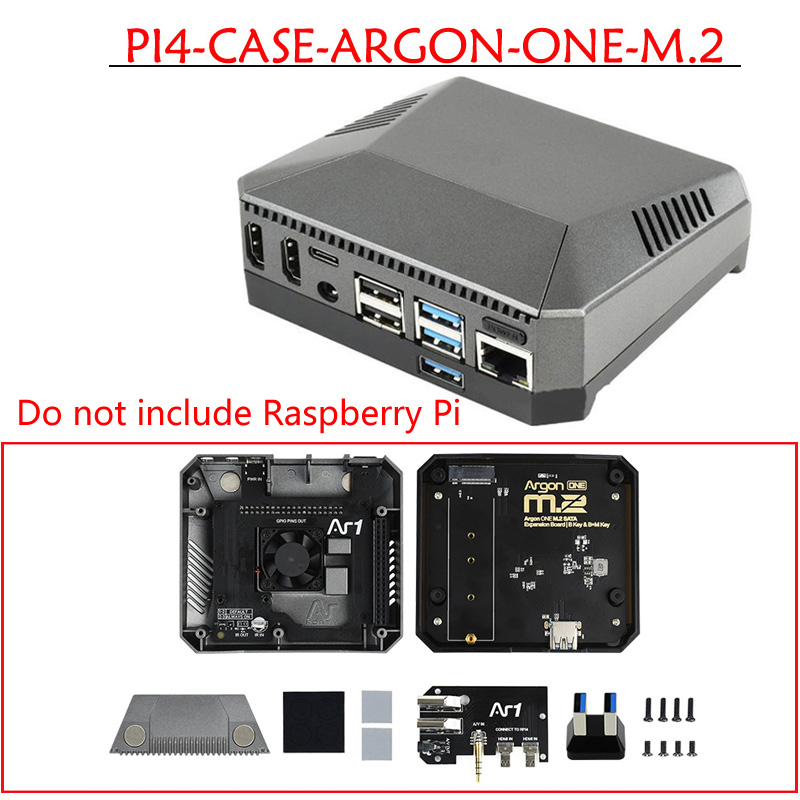
Raspberry Pi PI4-CASE-ARGON-ONE-M.2 User Guide
Introduction
The PI4-CASE-ARGON-ONE-M.2 metal case can greatly speed up the boot and storage speed of the Raspberry Pi, which is to extend the M.2 interface through the USB interface and use an external SSD as the main storage drive. In this case, the Raspberry Pi 4 can be booted through the USB interface, which greatly improves the reading and writing speed and makes the boot speed much faster than using the SD card.
How to boot Raspberry Pi 4 with SSD
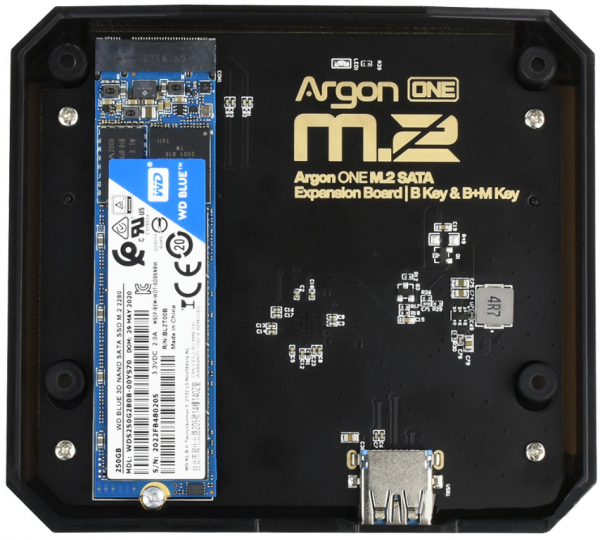
1.Assemble and install the SSD into the expansion board as shown below. (This product doesn't contain M.2 SSD and Raspberry Pi, please purchase separately if necessary)
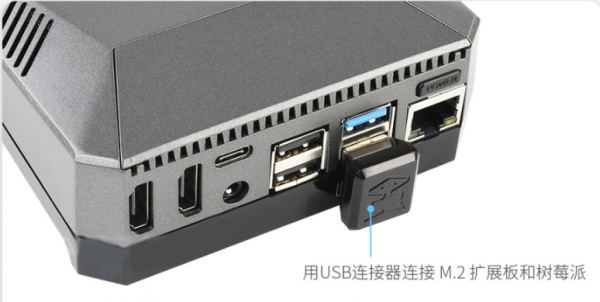
2.Connect the TF card to the PC and write the system image. After the image has finished writing, connect the SD card to the Raspberry Pi, connect the M.2 expansion board and the case, and then connect it with the Raspberry Pi4 using the USB Adapter.
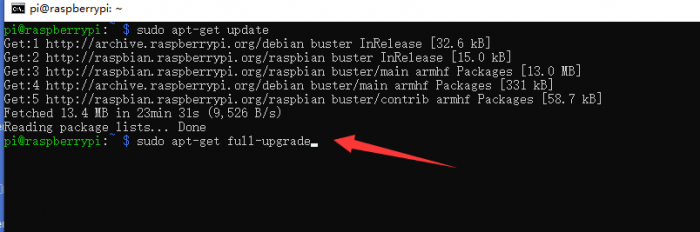
3.Enter the terminal of the Raspberry Pi to update system and firmware.
sudo apt-get update
sudo apt-get full-upgrade
sudo rpi-update
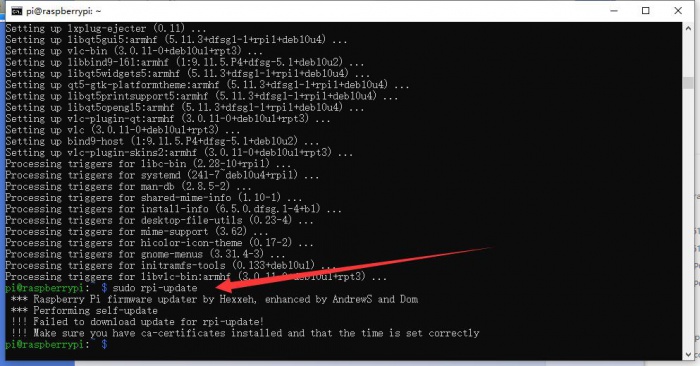
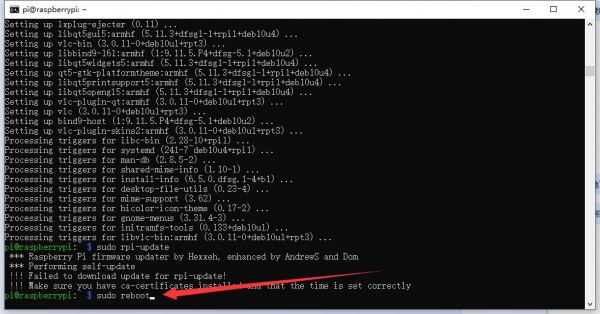
After the update is complete, reboot the Raspberry Pi.
sudo reboot
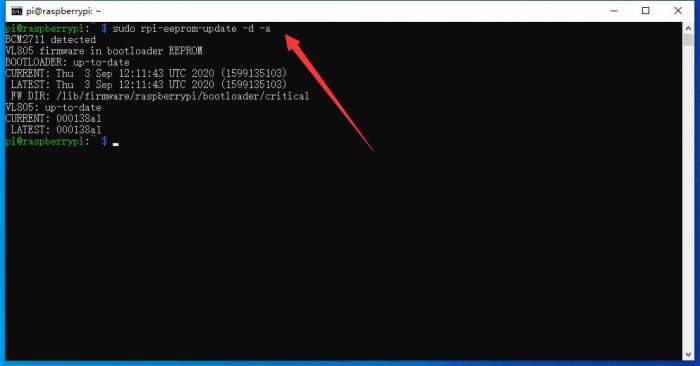
4.Enter the following command to install the latest bootloader.
sudo rpi-eeprom-update -d -a
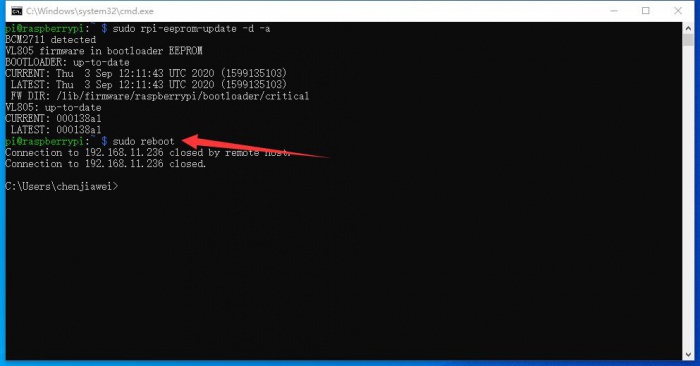
5.And then reboot the system.
sudo reboot
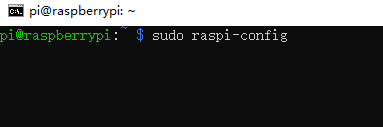
6.After system reboot,enter the following command to open the setup tool of the Raspberry Pi
sudo raspi-config
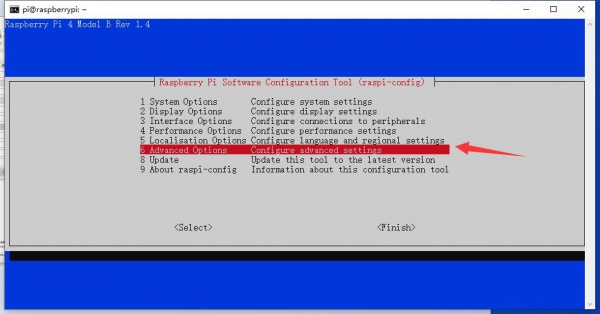
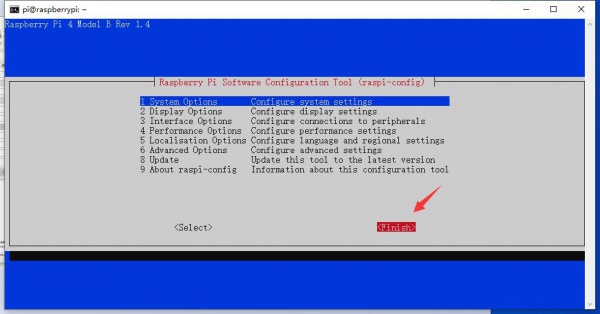
7.Choose "Advanced Options", then click 'Enter'.
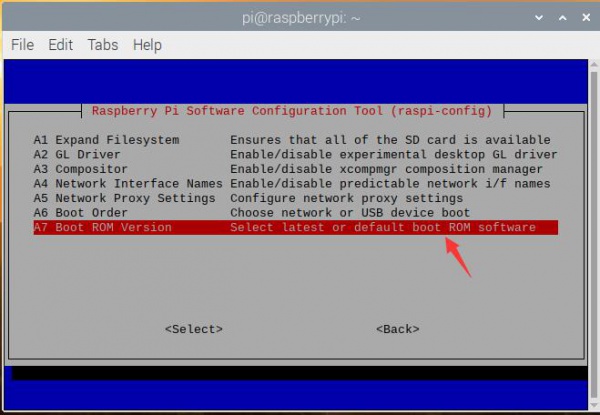
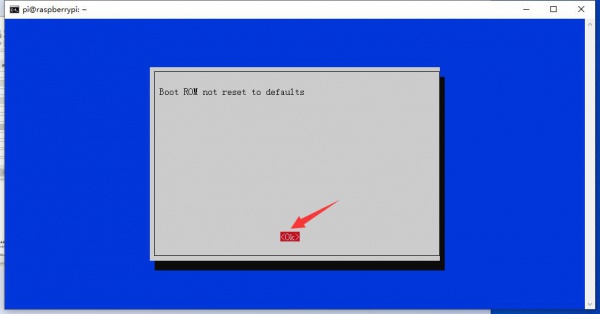
8.Choose "Boot ROM Version", then click 'Enter'.
9.Choose "No"
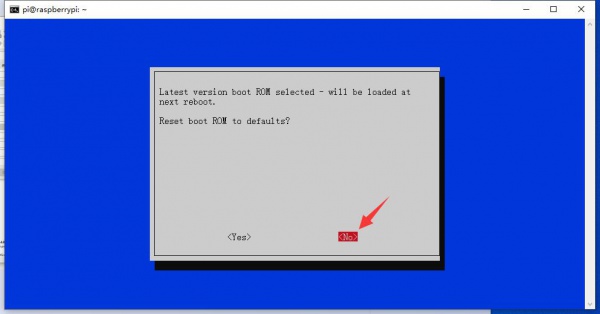
10.Click 'Enter'
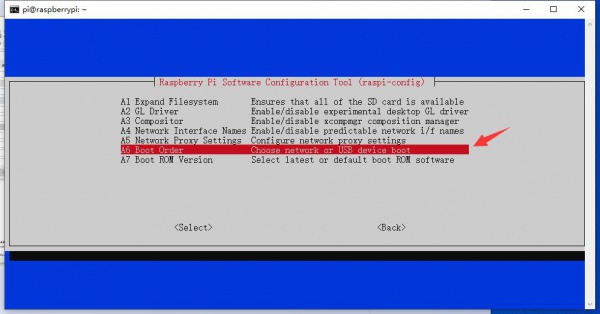
11. Then choose "Boot Order", click 'Enter'.
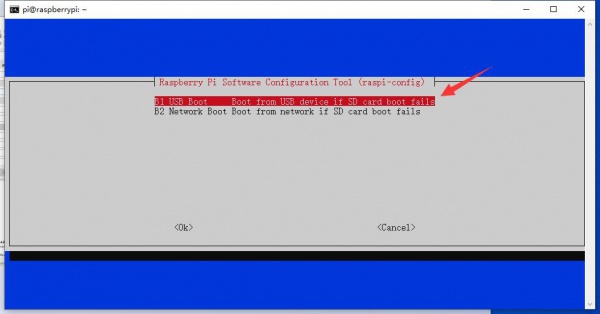
12.Choose "USB Boot", click 'Enter'.
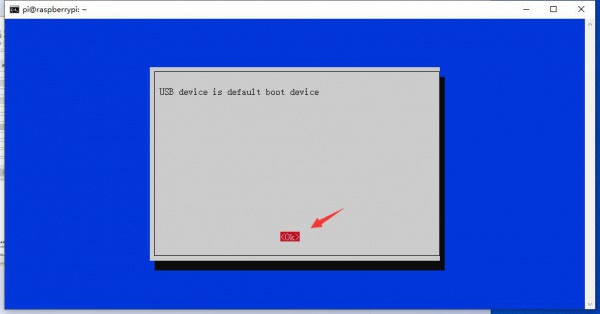
13.Click 'Enter' to confirm "USB device is default boot device".
14.Choose "Finish"to end the configuration.
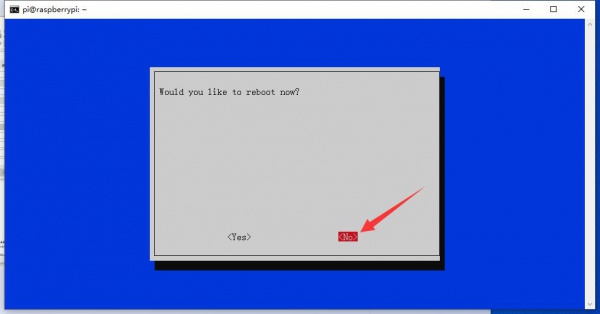
15.Choose "No" when the system ask "Would you like to reboot now?".
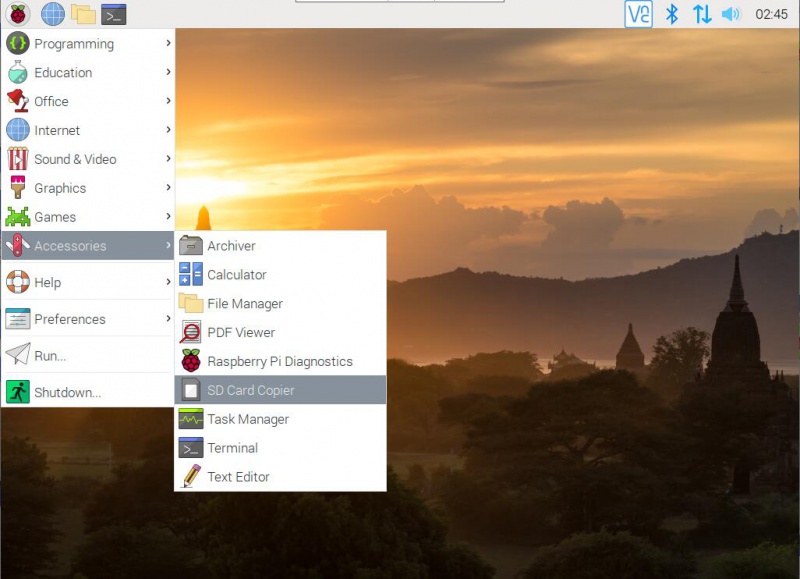
16.Click the Menu button on the desktop, choose "Accessories" and "SD Card Copier".
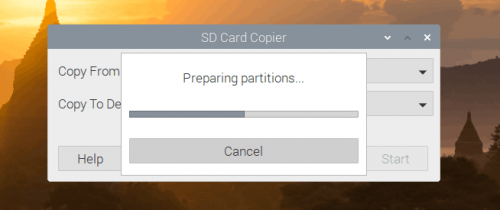
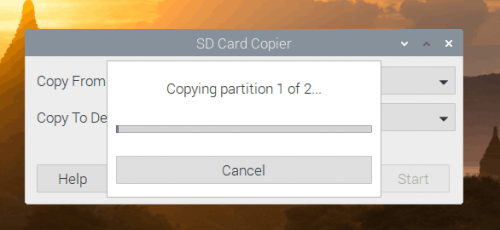
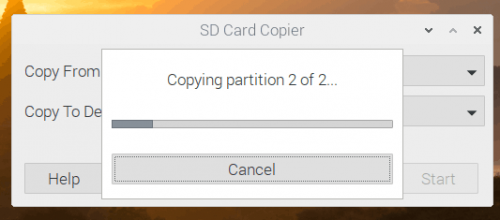
17.As shown in the figure below, select to copy the device from the 16sd card to the SSD, and then click Start.
Note: If the device to be copied is not recognized, please check whether the USB interface is connected.
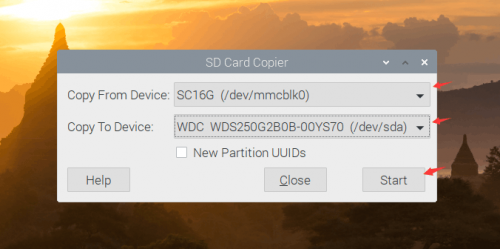
18. After the click the 'start', the system will automatically partition and then copy the corresponding content, wait for the system to finish copying and then click OK to complete. It may takes about 10 minutes.
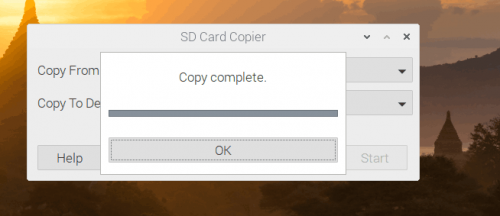
19. And then shut down the system.

20. Remove the shell, then take out the SD card, and reconnect the USB connector. And then reinstall the shell and power on the system, you can see the system booted through the SSD.
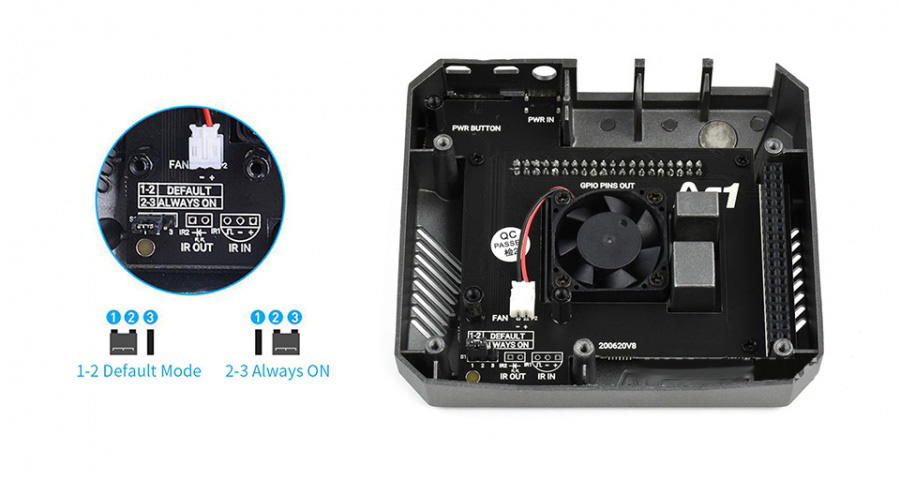
Install the fan and power button driver
1.The fan and power button can only work with the driver. You can directly refer to the manual which comes with the case.
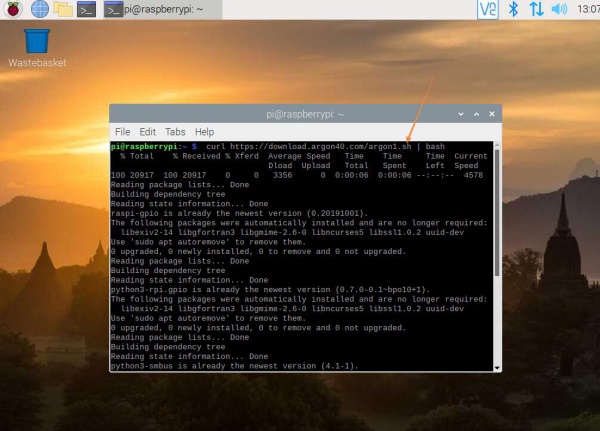
2.Open terminal of Raspberry Pi, install the driver by the following command
curl https://download.argon40.com/argon1.sh | bash
3.After installation, two shortcuts are added to the desktop, "configure" and "uninstall", they can be used to configure and uninstall the driver.
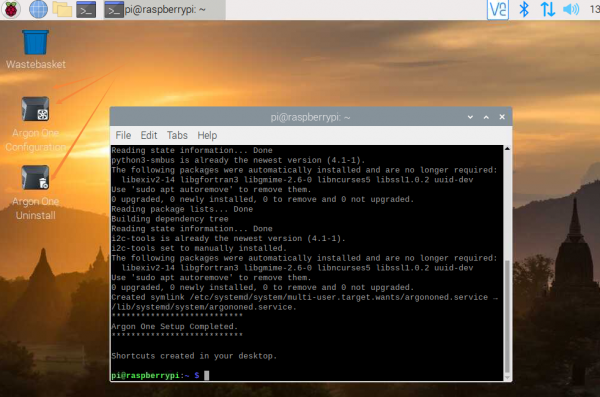
You can also use commands to configure and uninstall driver
argonone-config  #configure driver
argonone-uninstall  #uninstall driver
- The default setting of the fan is:
| CPU temperature | Fan speed |
|---|---|
| 55°C | 10% |
| 60°C | 55% |
| 65°C | 100% |
- Power button
| Raspberry Pi status | Button | Function |
|---|---|---|
| Shutdown | Press | Start |
| Working | Long-press (>3s) | Shutdown |
| Working | Press(<3s) | No function |
| Working | Double-click | Restart |
| Working | Long-press(>5s) | Force shutdown |