- sales/support
Google Chat: zj734465502@gmail.com
- sales
+86-0755-88291180
- sales01
sales01@spotpear.com
- sales02
dragon_manager@163.com
- support
services01@spotpear.com
- CEO-Complaints
manager01@spotpear.com
- sales/support
WhatsApp:13246739196
RP2040-Keyboard-3 User Guide
Demo
Official Resources
- Raspberry Pi Pico Schematic
- Pico Pinout
- Pico Datasheet
- Rp2040 Datasheet
- Hardware Design Manual
- Pico c sdk
- Pico python sdk
- Raspberry-pi-pico-faq
Overview
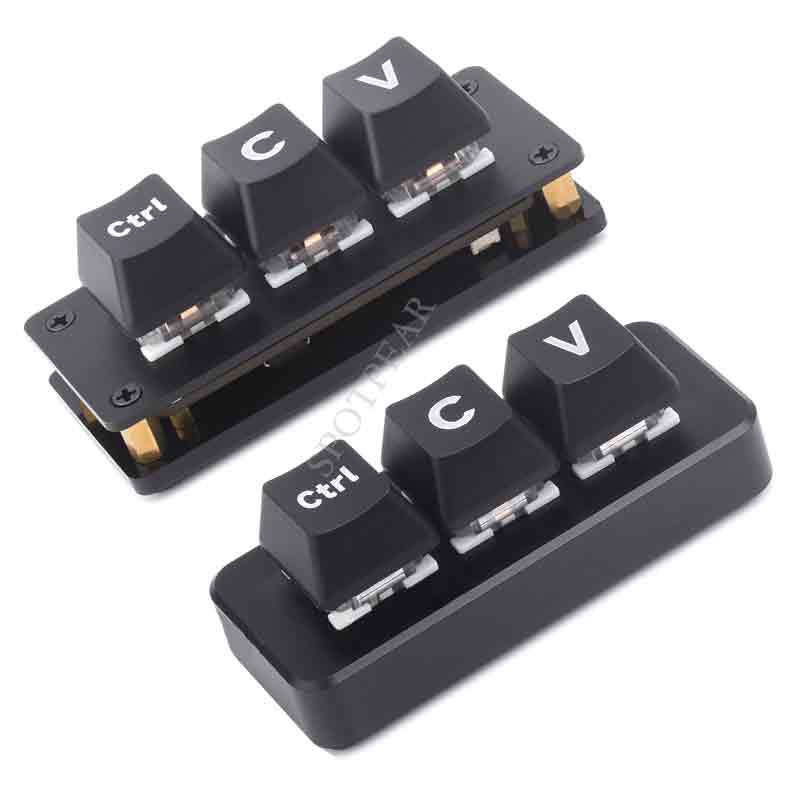
RP2040-Keyboard-3 is a high-performance, cost-effective three-key keyboard development board designed by Waveshare. It features programmable custom key functions and RGB lighting effects. With dual Type-C interfaces, it's driver-free and plug-and-play, utilizing hot-swappable technology allowing users to replace the keyboard switches. Additionally, it comes with dual-layer black keycaps without characters, which can be replaced as needed.
Features
- RP2040 microcontroller chip designed by Raspberry Pi in the United Kingdom.
- Dual-core Arm Cortex M0+ processor, flexible clock running up to 133 MHz.
- Dual Type-C ports (choose one of two), plug and play, driver free.
- The default function of three keys is "Ctrl", "C", and "V", programmable for other functions. Comes with two-layer black keycaps without character for customized use.
- Utilizes hot-swappable technology, allowing users to replace the switches.
- Adopts dustproof blue switch by default, providing more pronounced tactile feedback and mechanical feeling.
- The keys come with RGB LED and the backlight color can be customized according to your needs.
Dimensions

Pico Get Start Quick
Arduino IDE Series
Install Arduino IDE
- Download the Arduino IDE installation package from Arduino website.
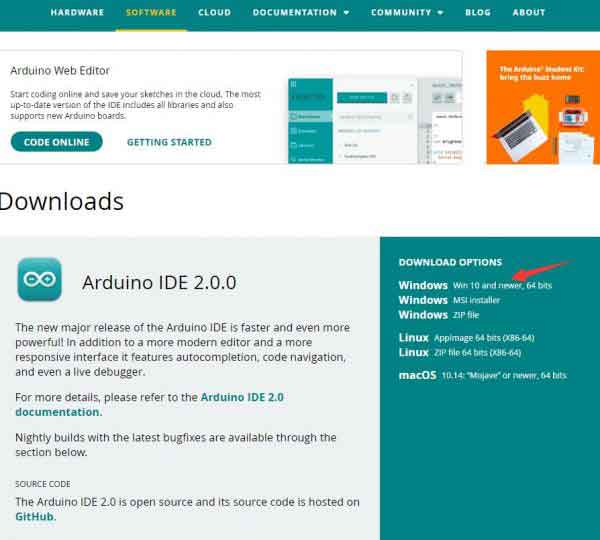
- Just click on "JUST DOWNLOAD".

- Click to install after downloading.
- Note: You will be prompted to install the driver during the installation process, we can click Install.
Install Arduino-Pico Core on Arduino IDE
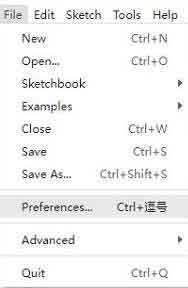
- Open Arduino IDE, click the File on the left corner and choose "Preferences".
- Add the following link in the additional development board manager URL, then click OK.
https://github.com/earlephilhower/arduino-pico/releases/download/global/package_rp2040_index.json
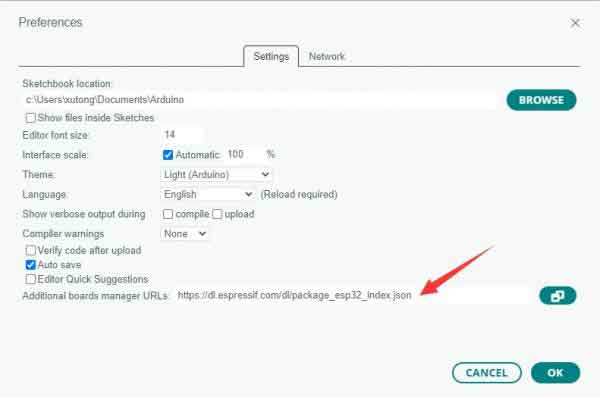
Note: If you already have the ESP8266 board URL, you can separate the URLs with commas like this:https://dl.espressif.com/dl/package_esp32_index.json,https://github.com/earlephilhower/arduino-pico/releases/download/global/package_rp2040_index.json
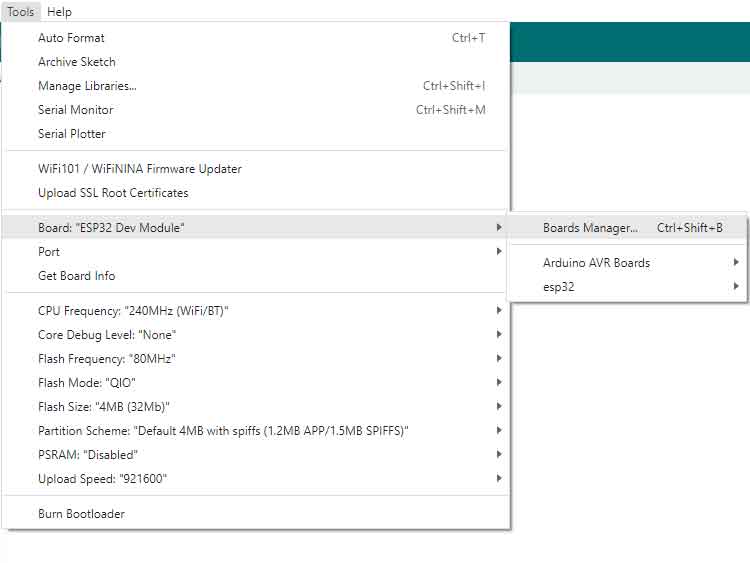
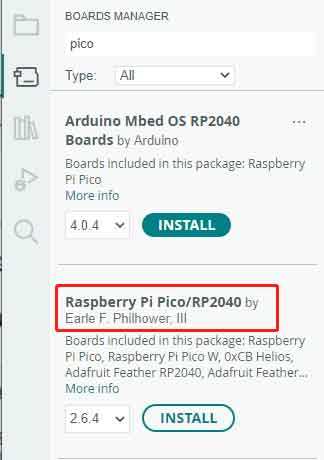
- Click on Tools -> Dev Board -> Dev Board Manager -> Search for pico, it shows installed since my computer has already installed it.
Upload Demo At the First Time
- Press and hold the BOOTSET button on the Pico board, connect the Pico to the USB port of the computer via the Micro USB cable, and release the button when the computer recognizes a removable hard drive (RPI-RP2).
- Download the demo, open arduino\PWM\D1-LED path under the D1-LED.ino.
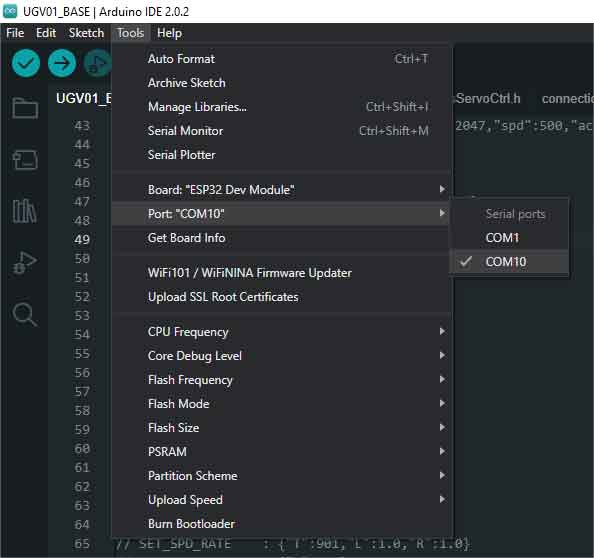
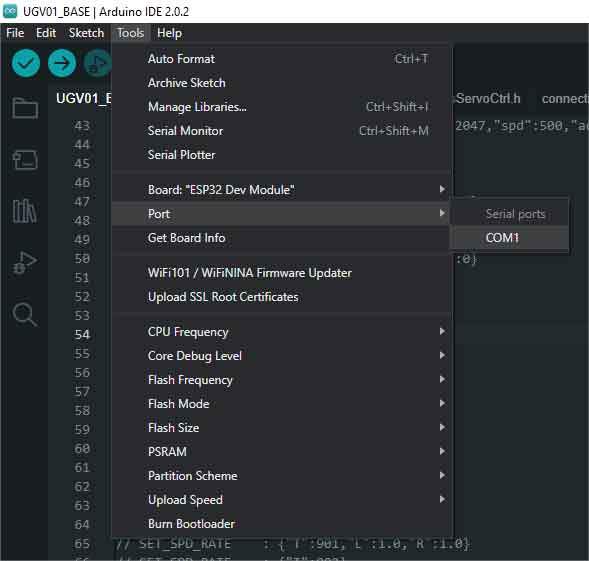
- Click Tools -> Port, remember the existing COM, do not need to click this COM (different computers show different COM, remember the existing COM on your computer).
- Connect the driver board to the computer with a USB cable, then click Tools -> Ports, select uf2 Board for the first connection, and after the upload is complete, connecting again will result in an additional COM port.
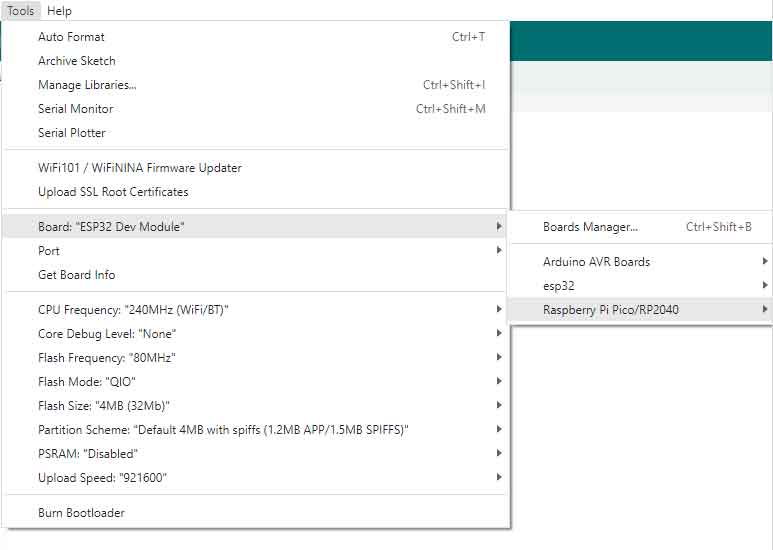
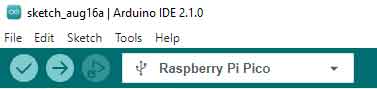
- Click Tool -> Dev Board -> Raspberry Pi Pico/RP2040 -> Raspberry Pi Pico.
- After setting, click the right arrow to upload.
- If you encounter problems during the period, you need to reinstall or replace the Arduino IDE version, uninstall the Arduino IDE needs to be uninstalled cleanly, after uninstalling the software you need to manually delete all the contents of the folder C:\Users\[name]\AppData\Local\Arduino15 (you need to show the hidden files in order to see it) and then reinstall.
Sample Demo
Arduino Demo
Dependence Library Installation
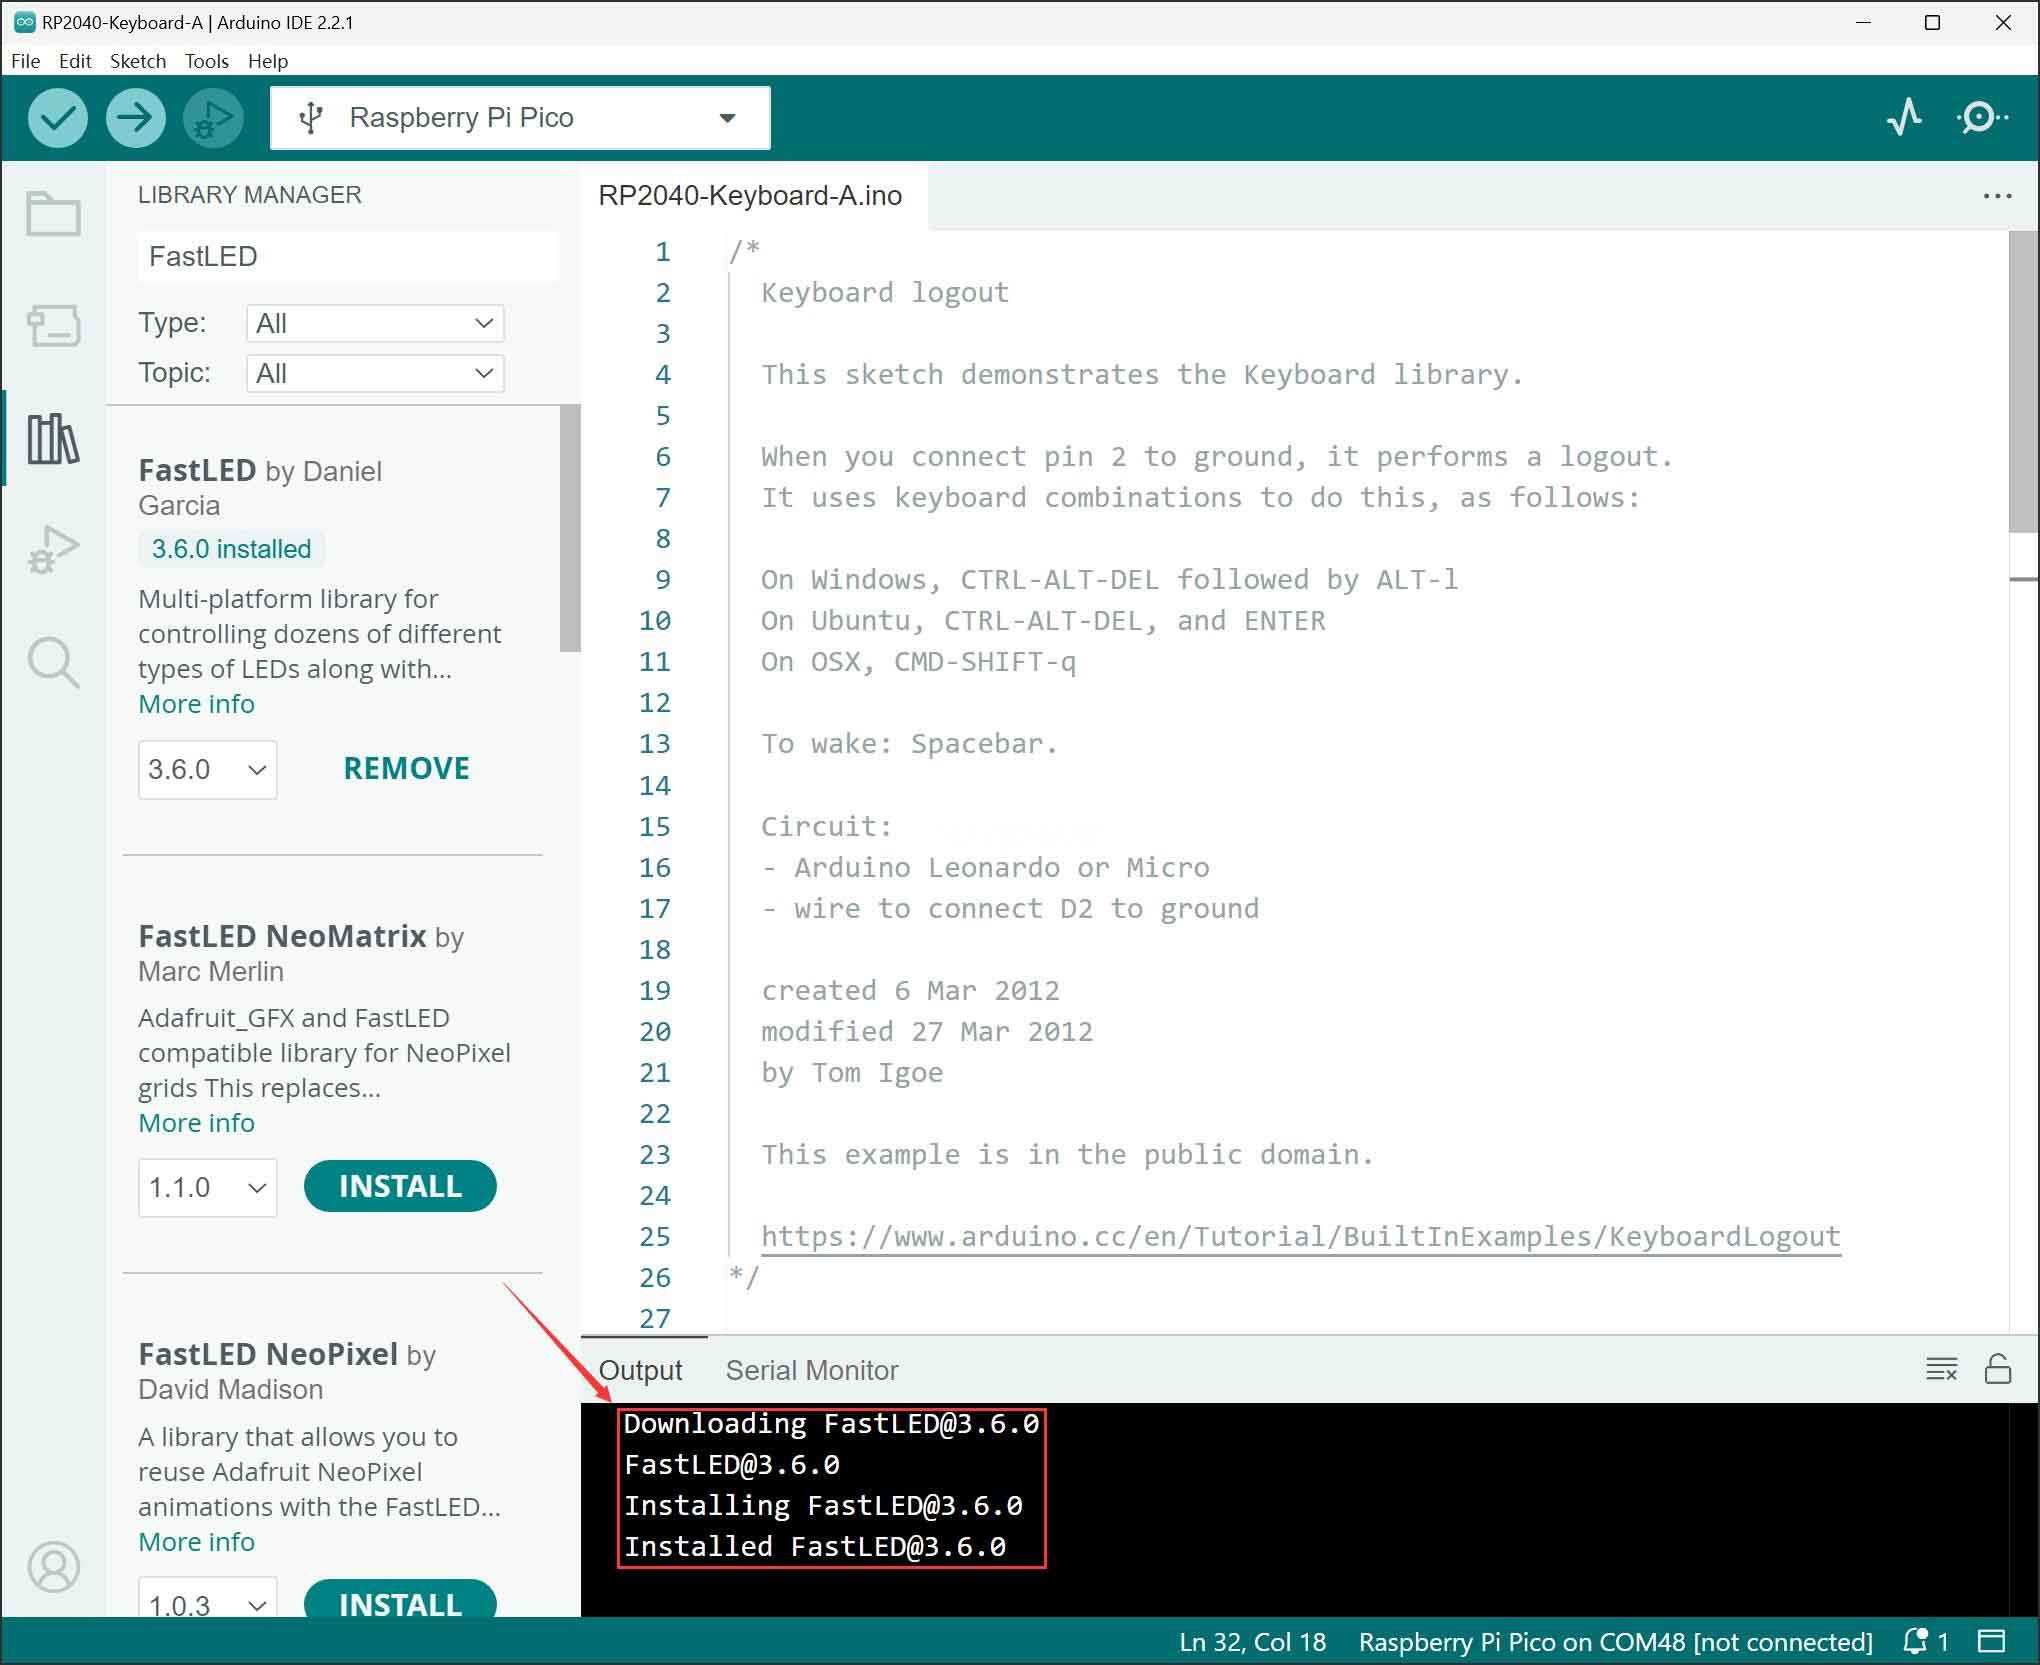
This demo should be used withe FastLED library, the specific installation steps are shown below:
- 1. Install FastLED library:
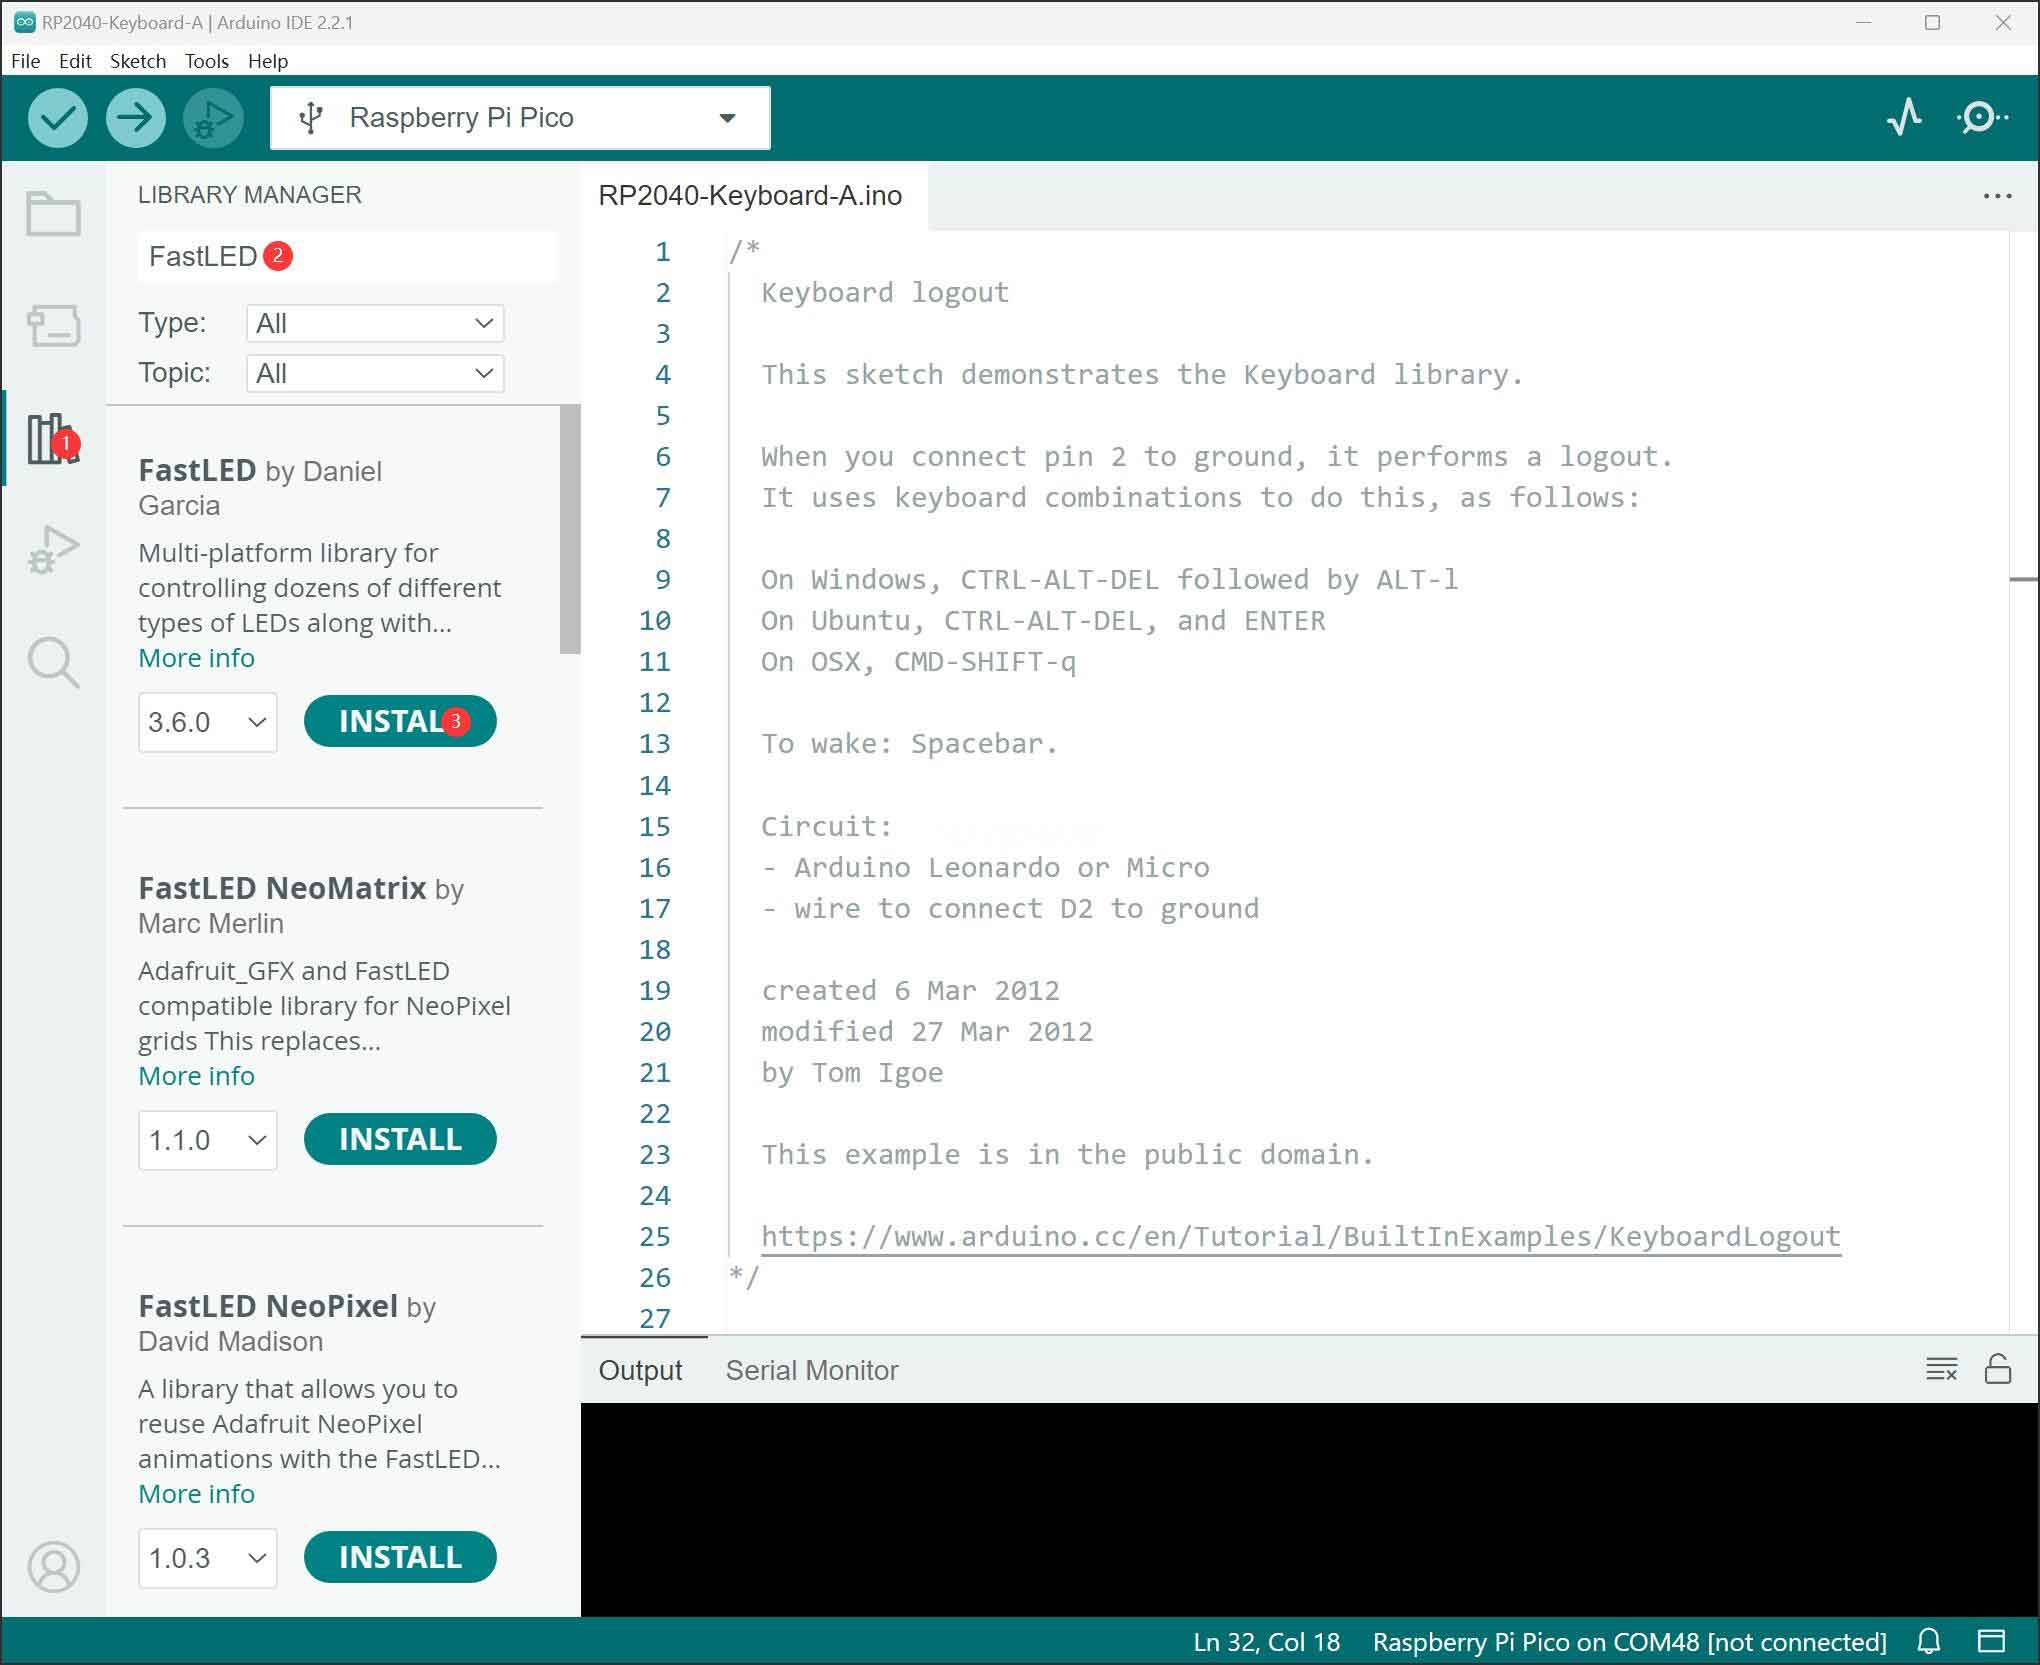
- 2. Installation finished:
Demo Description
- RP2040-Keyboard-3, when connected as a keyboard device to a computer, facilitates the mapping of keycaps to specific functions.
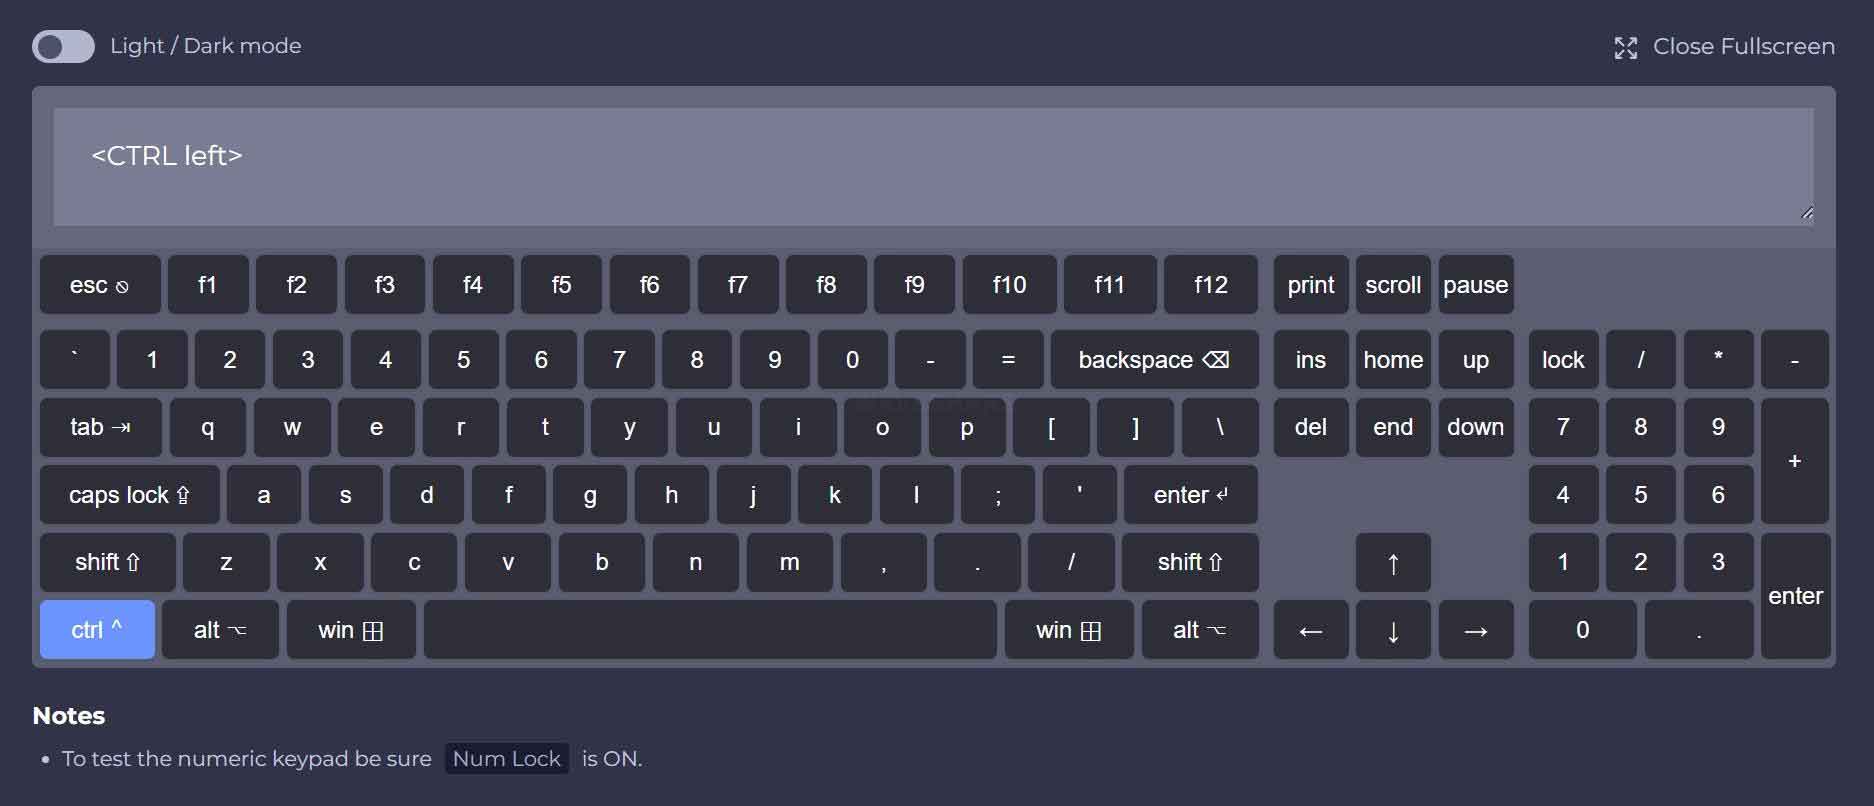
- You can test the key function by using an online keyboard.
- Test the "CTRL" key:
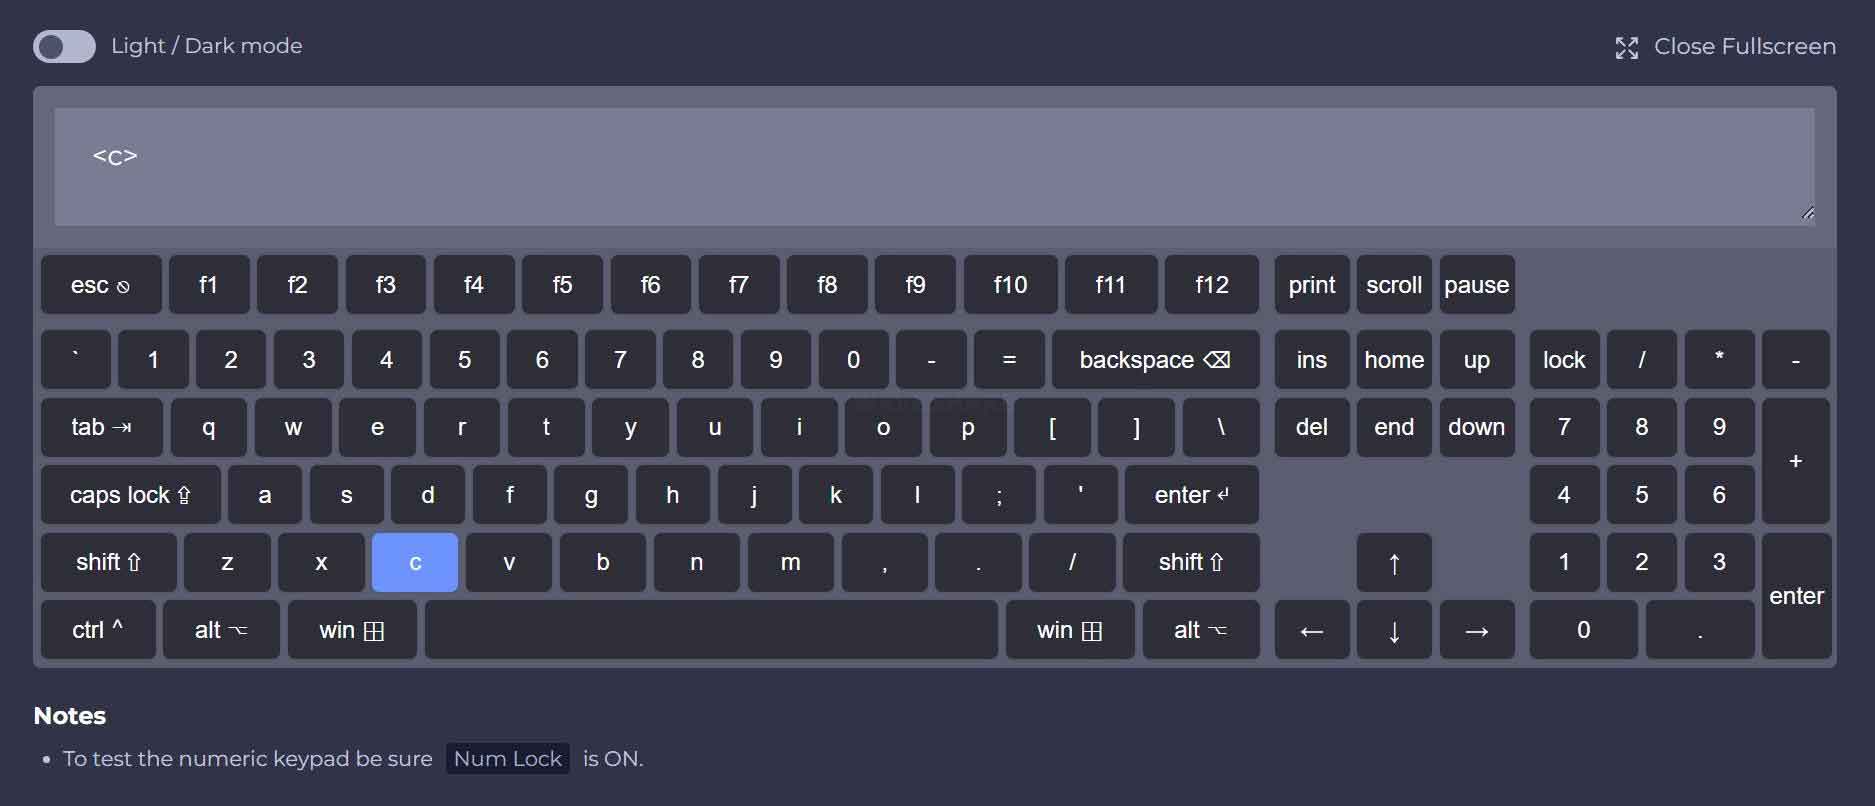
- Test the "C" key:
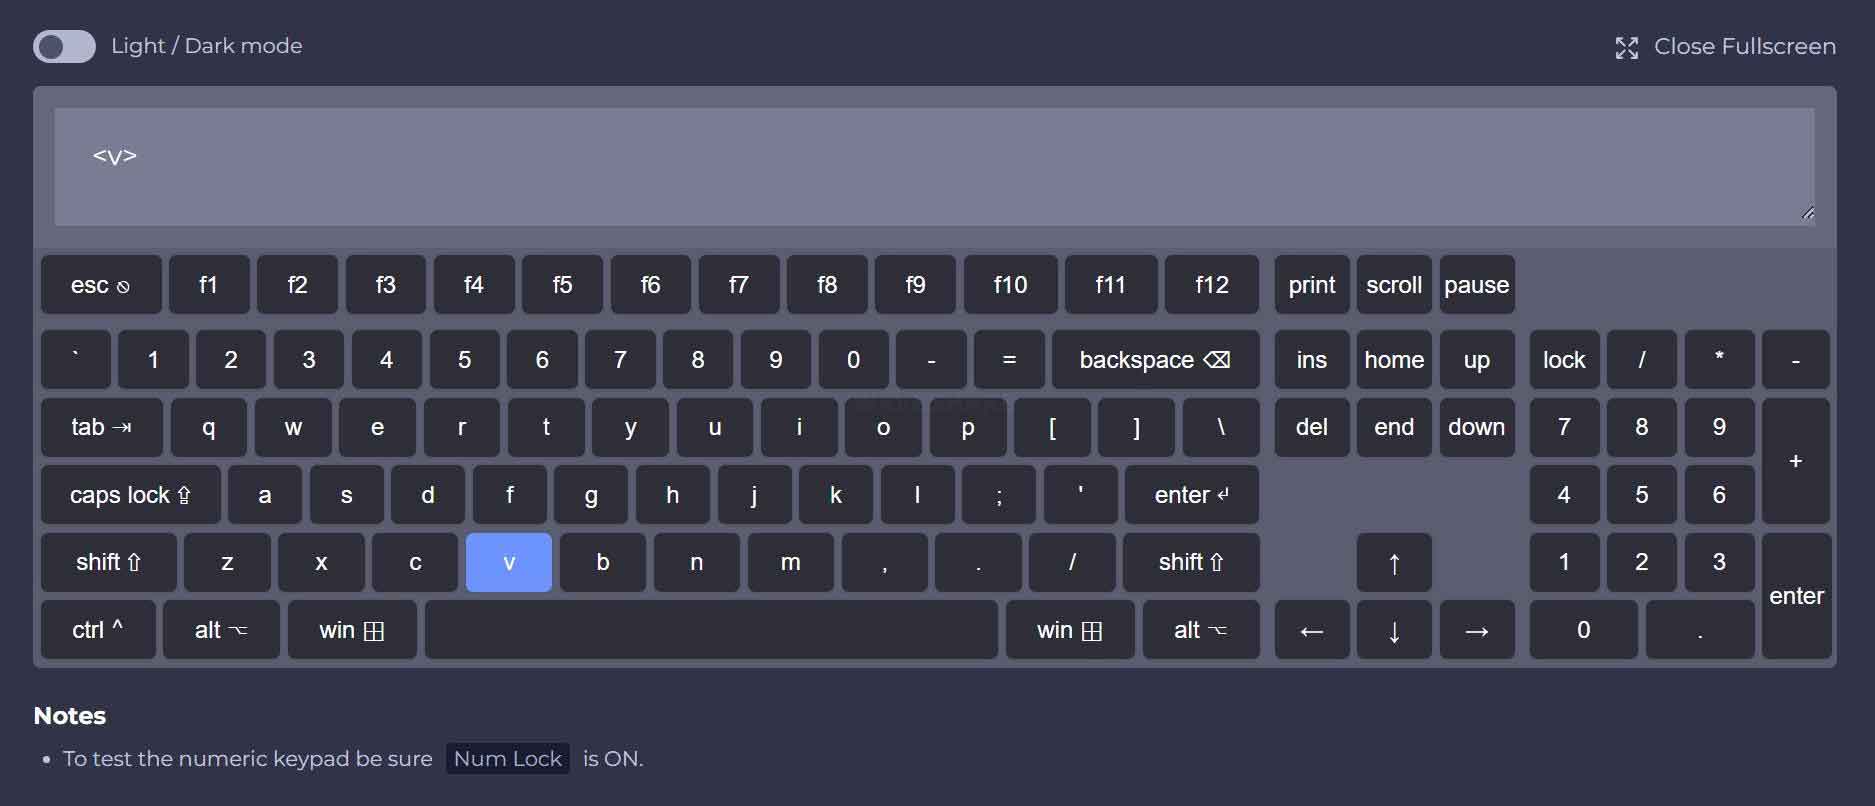
- Test the "V" key:
Demo Analysis
Initialization
void setup() {
  pinMode(12, INPUT_PULLUP);
  pinMode(13, INPUT_PULLUP);
  pinMode(14, INPUT_PULLUP);
  pinMode(25, OUTPUT);
  FastLED.addLeds<WS2812, LED_PIN, GRB>(leds, NUM_LEDS);
  Keyboard.begin();
}- The three buttons on the RP2040-Keyboard-3 are connected to the Pico's GP12, GP13, and GP14 pins. These buttons are low-level triggered, so here, these three pins are configured as pull-up inputs.
- Use FastLED library to configure LED types, LED control pins, and GRB color sequence. leds is for storing LED color information arrays, and NUM_LEDS is the number of the LEDs.
- Activate keyboard emulation, initialize the Arduino keyboard library, and prepare to begin simulating keyboard input.
Main Loop
void loop() {
  ...
  if(digitalRead(12) == LOW){
    Keyboard.press('v');
    for(int i = 0;i <= 2;i++){
      leds[i] = CRGB(255,0,0);
      FastLED.show();
      delay(5);
    }
  }else{
    Keyboard.release('v');
  }
  ...
}- Keyboard.press('v')
Function prototype: size_t press(uint8_t k), where the parameter k is the key value. It simulates pressing the key specified by k. In the demo, we use Keyboard.press('v') to simulate pressing the 'v' key.
- Keyboard.release('v')
Function prototype: size_t release(uint8_t k), where the parameter k is the key value. It simulates releasing the key specified by k. In the demo, we use Keyboard.release('v') to simulate releasing the 'v' key.
- In the main loop, the program checks the pin level to determine the button state. If it's at a low level, it calls Keyboard.press() to simulate pressing the button. If it's at a high level, it calls Keyboard.release() to simulate releasing the button.
- If the 'v' key is pressed, it sets the colors of all three LEDs in the LED array to red (RGB values 255, 0, 0). Then it calls FastLED.show() to display the LEDs.
Key Modification
RP2040-Keyboard-3 supports customizing key functions. Below are the specific steps to modify key functions:
- Non-functional keys:
From the previous description, it's evident that modifying key functions requires altering the key value passed to the press function. If you want to change it to another non-functional key such as a letter, number, or symbol key, simply modify the character within the quotes to achieve this.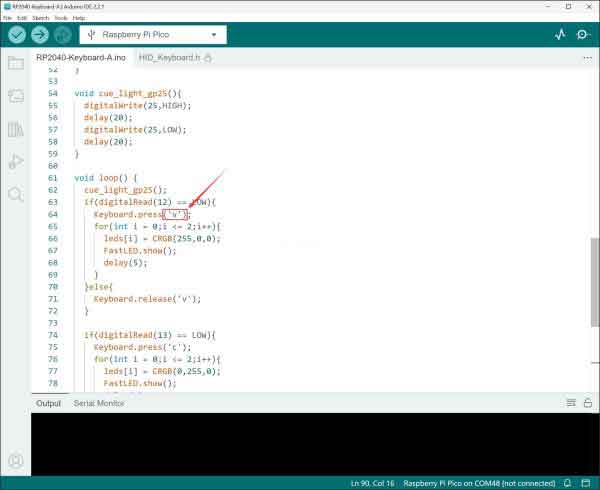
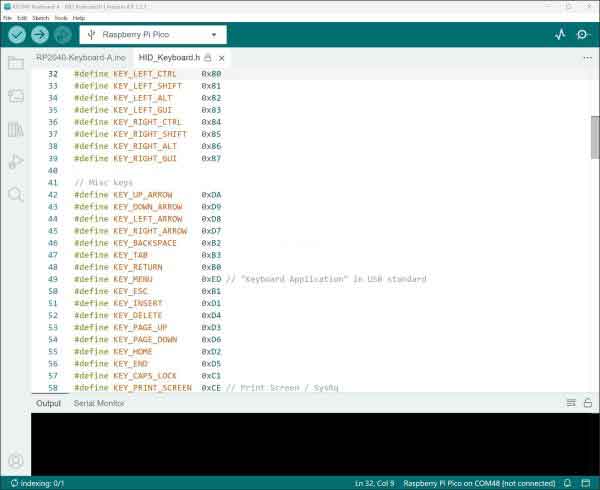
- Function key
To modify it to other functional keys like TAB, SHIFT, or CTRL, you need to locate the macro definitions for these keys. These macro definitions can be found in the HID_Keyboard.h file. In your demo, you can click on KEY_LEFT_CTRL and then use CTRL+F12 or right-click to directly navigate to the HID_Keyboard.h file. Find the corresponding macro definition for the desired key and pass it through the press function.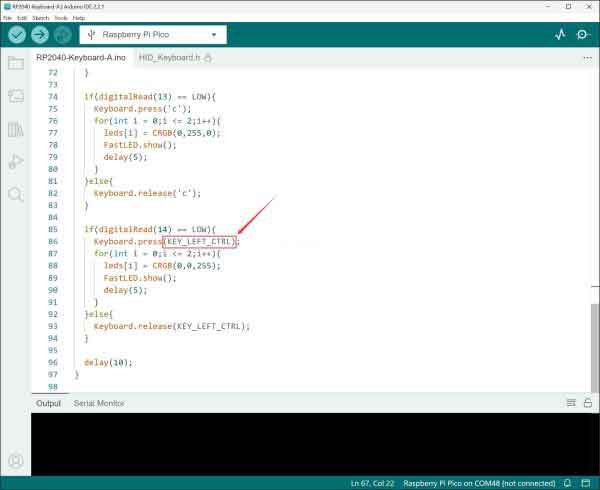
- Combine key
For triggering a combination key effect by pressing a single key, you simply need to call the press function twice to simulate pressing a combination key.