- sales/support
Google Chat:---
- sales
+86-0755-88291180
- sales01
sales@spotpear.com
- sales02
dragon_manager@163.com
- support
tech-support@spotpear.com
- CEO-Complaints
zhoujie@spotpear.com
- Only Tech-Support
WhatsApp:13246739196
- Purchase/Shipping/Refund
WhatsApp:13424403025
Raspberry Pi ------ 3.6 RGB effect User Guide
6 RGB effect
The Raspberry Pi RGB_Cooling_HAT needs to be properly plugged into the GPIO port of the Raspberry Pi and open the Raspberry Pi system I2C function.
This experimental phenomenon shows that all RGB light become purple breathing light.
1. File transfer
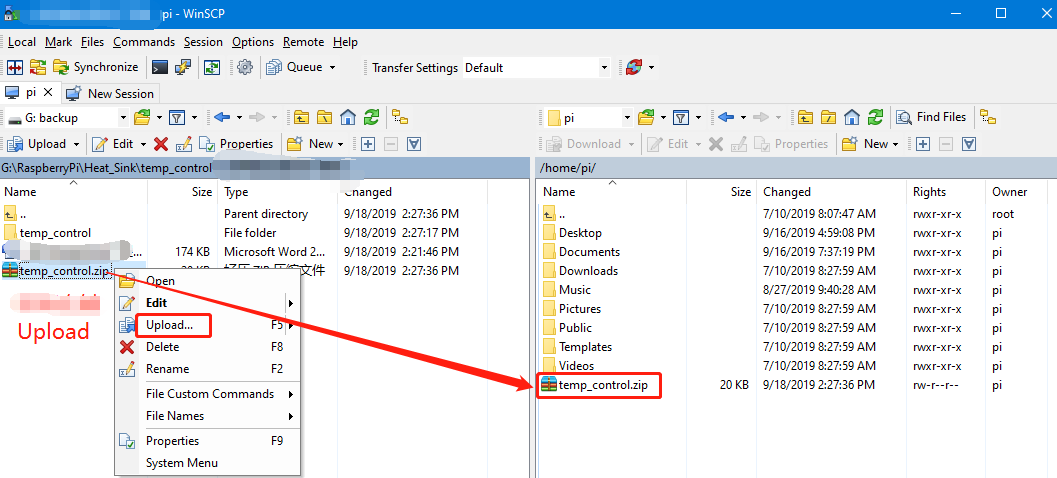
1.1 Install WinSCP tool on the computer side, connect the Raspberry Pi and transfer the temp_control.zip package to the pi directory of the Raspberry Pi.
Path of WinSCP:[Raspberry Pi RGB_Cooling_HAT]---[Tools]---[winscp556_setup.1416364912.exe]
1.2 Extract file
Open the Raspberry Pi terminal and input command ls to find the temp_control.zip file.
As shown below:

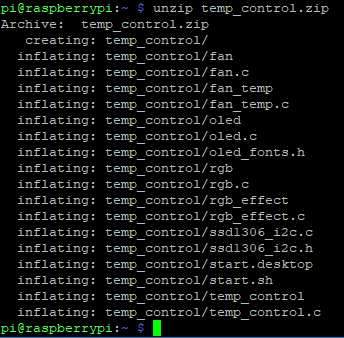
Input command to extract file:
unzip temp_control.zip
2. Compiling and running program
2.1 Input command to enter temp_control find file:
cd temp_control/
ls

2.2 Input command to compile:
gcc -o rgb_effect rgb_effect.c -lwiringPi

Among them, the gcc compiler is called, -o means to generate the file, rgb_effect is the generated file name, rgb_effect.c is the source program, -lwiringPi is the wiringPi library that references the Raspberry Pi.
2.3 Input command to run the program
./rgb_effect

We can see that all RGB light become purple breathin light.
3. About code
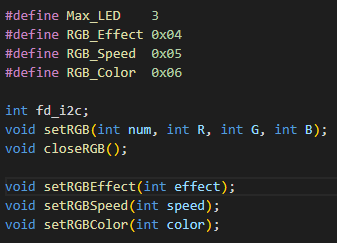
3.1 There are three RGB lights on the expansion board, so the number of defined lights is 3,
Define the register address: RGB_Effect is 0x04, RGB_Speed is 0x05, and RGB_Color is 0x06. Declare the function you need to use.
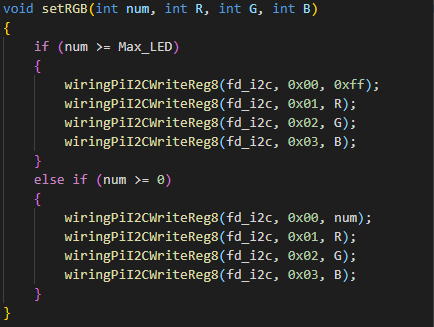
3.2 void setRGB(int num, int R, int G, int B) function:
Set the RGB light color, num refers to which light, 0 is the first light, 1 is the second light, 2 is the third light. If it is greater than or equal to 3, then, all the lights are set at the same time. The R, G, and B values range from 0 to 255.
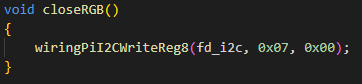
3.3 Turn off RGB. According to the protocol, the RGB register is turned off to 0x07 and the data is 0x00.
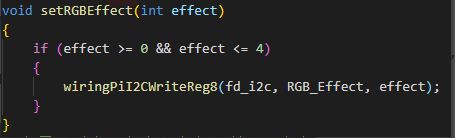
4. void setRGBEffect(int effect) function:
First,we need to judge the input value. There are five kinds of special effects to choice, 0-water light, 1-breathing light, 2-marquee, 3-rainbow lights, 4-colorful lights.
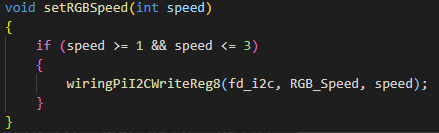
5. void setRGBSpeed(int speed) function:
Modify the RGB light switching speed of the mode. 1-low speed, 2-medium speed (default), 3-high speed. If you do not set, it is medium speed(default).
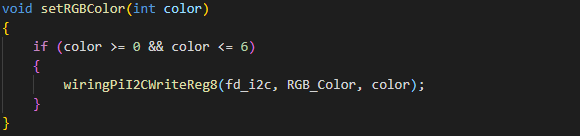
6. void setRGBColor(int color) function:
Set the color of the water light and breathing light, 0-red, 1-green (default), 2-blue, 3-yellow, 4-purple, 5-cyan, 6-white.
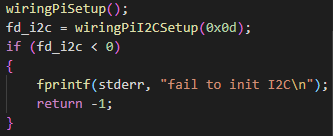
7.Initialize the I2C configuration
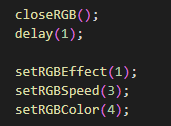
8.An example of setting a purple high-speed breathing light.